
Lawn
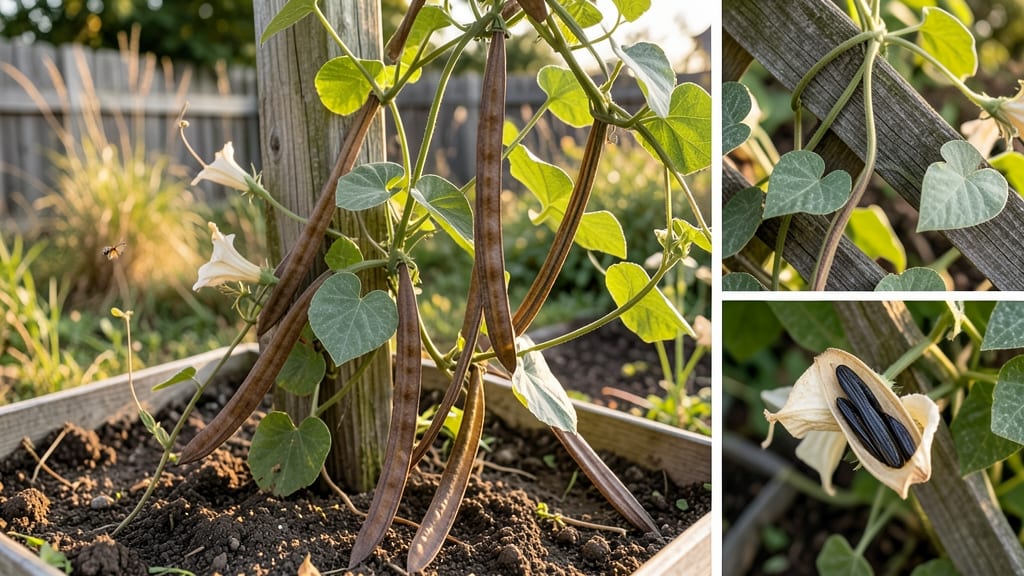
Moonflower bush seed pods hold the secret to next year’s moonlit blooms—if you break their dormancy right. 🌙 I’ve learned the hard way that skipping this step means waiting another season for those dramatic, creamy-white flowers to reappear.
The key is knowing exactly when to harvest, how to store those pods, and the little trick that tricks seeds into germinating when spring arrives.
First, you’ll need a sharp pair of pruners, a paper bag for collecting pods, and a cool, dark spot for storage. Harvest pods when they turn brown and papery—usually late fall—then crack them open to reveal the flat, dark seeds inside.
Store them in a sealed container with a bit of damp sand to keep them from drying out completely. This mimics the natural winter chilling they need to break dormancy.
When spring rolls around, you’ll see those seeds sprout faster and stronger than store-bought seedlings. The young plants need bright light and consistent moisture, but avoid overwatering—they hate soggy soil.
Within weeks, you’ll spot the first true leaves, and by summer, you’ll have a thriving bush ready to bloom again under the moonlight.
This method works for both moonflower bushes and their climbing cousins, giving you control over varieties and timing. No more waiting for nature’s schedule—you’ll be the one setting it. Here’s how to make it happen without a single failed sprout.
📚 In This Guide
- What you need
- Instructions
- Tips and common mistakes
- Wrapping up and next steps
What you need
- ● Moonflower seed pods: 10–20 mature, fully dried pods (harvest when brown and crispy).
- ● Pruning shears or scissors: Sharp, clean pair for pod collection.
- ● Paper towels or coffee filters: 2–3 sheets for moisture control.
- ● Plastic zip-top bags: 2–4 quart-sized bags (sealable, reusable).
- ● Water: Distilled or room-temperature tap water (avoid chlorine).
- ○ Spray bottle (optional): For gentle misting if pods are extra dry.
- ● Small container or tray: Shallow (e.g., plastic takeout box) for stratification setup.
- ● Refrigerator or cold frame: Space to maintain 32–40°F (0–4°C) for 4–8 weeks.
- ● Planting pots or seed trays: 2–3 small pots (3–4" diameter) with drainage holes.
- ● Potting mix: Well-draining, seed-starting blend (e.g., 50% peat/50% perlite).
- ● Grow lights or sunny windowsill: For 12+ hours of light post-stratification.
- ● Hydrogen peroxide (3%): 1 tsp per cup of water for seed disinfection.
- ● Plant labels & marker: To track stratification dates.
- ● Humidity dome or plastic wrap: For extra moisture retention.
- ● Garden journal: To log dormancy progress and blooming timelines!
Step-by-step guide to breaking moonflower seed pod dormancy
Here’s how to coax next year’s moonflower blooms from this year’s pods—no fancy tools, just patience and timing.
🌱 Step 1: Harvest and Dry the Seed Pods
Wait until the pods turn brown and begin splitting open naturally—this usually happens in late fall or early winter. Harvest them when they’re mostly dry but still intact, then spread them out on a paper towel in a single layer. Place them in a warm, dry spot with good air circulation, like a sunny windowsill or a well-ventilated shelf.
Leave them there for 2-3 weeks, gently turning them every few days. You’ll know they’re ready when the pods are completely dry and brittle to the touch. If moisture lingers, the seeds may rot before you can plant them. Store the dried pods in a paper bag in a cool, dark place until you’re ready to process them.
🌿 Step 2: Extract the Seeds and Stratify
Once fully dry, open the pods carefully—some may split on their own, while others need a gentle squeeze. Inside, you’ll find flat, dark seeds about the size of a pencil eraser. Remove any debris or empty seed casings, then place the clean seeds in a small container with a damp paper towel. Fold the towel over them to keep them moist but not soggy.
This is where the magic happens: stratification. Moonflower seeds need a cold period to break dormancy. Place the container in a sealed plastic bag and refrigerate it for 6-8 weeks at 35-40°F. Check the seeds weekly—they should stay slightly damp, like a wrung-out sponge. If they dry out, mist them lightly with water.
☀️ Step 3: Plant the Stratified Seeds
After the cold treatment, remove the seeds from the fridge and let them sit at room temperature for 24 hours to adjust. Fill small pots with well-draining potting mix (moonflowers hate soggy roots) and plant the seeds ½ inch deep, spacing them 1 inch apart. Water gently until the soil is moist but not dripping.
Place the pots in a warm spot with bright, indirect light—a sunny windowsill works well. Keep the soil consistently moist but never waterlogged. You should see sprouts in 2-4 weeks, though some seeds may take longer. Once the seedlings have 2-3 true leaves, they’re ready to transplant into larger containers or the garden.
⏰ Step 4: Harden Off and Plant Outdoors
About 2 weeks before your last frost date, start hardening off the seedlings. Move them outdoors to a sheltered spot for 1-2 hours the first day, gradually increasing their time outside over 7-10 days. This helps them adjust to sunlight and temperature changes without shock.
Plant them in the garden after all danger of frost has passed, spacing them 3-4 feet apart in well-draining soil with full sun. Water deeply at planting and keep the soil moist for the first few weeks. Moonflowers grow fast, so they’ll need support as they mature—install a trellis or stakes early to avoid damaging their vines later.
Tips & tricks for perfect moonflower seed pod dormancy
These little-known tricks will help you maximize your moonflower seed success without any extra fuss.
Pod Maturity Matters: Don't rush harvesting those pods! Wait until they're fully brown and starting to crack naturally—this usually happens in late fall. If you harvest too early, the seeds won't be fully mature and may not germinate properly. I've learned the hard way that patience pays off here. The pods should feel dry and papery to the touch before you begin processing.
Stratification Temperature: While the instructions specify 35-40°F, I've found that the coldest part of most home fridges (around 38°F) works perfectly for this process. Just make sure your fridge isn't too humid—condensation can cause mold. Place a small fan nearby if your fridge tends to get damp, and check your seeds weekly to maintain that perfect "wrung-out sponge" moisture level.
Lighting Secrets: For Step 3, while bright indirect light is ideal, I've had great success with grow lights placed about 6 inches above the seedlings. If you don't have a sunny windowsill, a simple LED grow bulb on a timer (12-14 hours of light per day) works wonders. Just avoid direct sunlight through glass windows—it can create hot spots that stress delicate seedlings.
Harden Off Gradually: The 2 weeks before your last frost date is your window for hardening off, but don't feel pressured to rush. Start with just 1-2 hours on the first day, then increase by about 30 minutes each subsequent day. I've seen seedlings shocked by sudden temperature changes even when following the 7-10 day timeline—take it even slower if your climate swings dramatically. A sheltered spot like under a tree or against a south-facing wall works perfectly for this process.
Pro Tips for Moonflower Bush Seed Pod
- These little-known tricks will help you maximize your moonflower seed success without any extra fuss.
- Pod Maturity Matters: Don't rush harvesting those pods! Wait until they're fully brown and starting to crack naturall...
- Stratification Temperature: While the instructions specify 35-40°F, I've found that the coldest part of most home fri...
Frequently asked questions
Got questions about moonflower bush seed pods and how to prep them for next season? You’re not alone! Here are some of the most common queries—and their answers—to help you troubleshoot and plan ahead.
When is the best time to collect moonflower seed pods?
The ideal time to harvest moonflower seed pods is in late fall or early winter (after the first frost), when the pods turn brown and dry but haven’t split open yet. Collect them on a dry day to prevent mold. If you miss this window, pods may release seeds prematurely—so keep an eye out!
How do I break dormancy for moonflower seeds?
Moonflower seeds require stratification (a cold period) to germinate. Place collected pods in a paper bag and refrigerate them for 4–6 weeks in a moist (not soggy) medium like peat moss. After stratification, sow seeds in well-draining soil, ½ inch deep, in spring. Patience pays off—these seeds can take 2–3 weeks to sprout!
What if my moonflower pods won’t open naturally?
If pods stay closed despite drying, gently nick the seam with scissors or soak them in warm water for 24 hours to soften the casing. Avoid forcing them open—this can damage the seeds. Once the pod splits, remove the seeds and air-dry them before storage. Pro tip: Label pods with the harvest date to track freshness!
Can I grow moonflower from store-bought seeds instead of pods?
Yes! Store-bought moonflower seeds (Ipomoea alba) work, but they may skip the dormancy step if pre-treated. For best results, still stratify them for 2–4 weeks in the fridge. However, seeds from your own pods often germinate more reliably since they’re adapted to your local climate. Plus, it’s a fun way to preserve heirloom varieties!
Why aren’t my moonflower seeds germinating?
Common culprits include:
- Improper stratification: Seeds need consistent cold (34–40°F) and moisture.
- Poor soil: Use a mix of potting soil and perlite for drainage.
- Temperature swings: Keep soil 70–75°F during germination.
- Old seeds: Moonflower seeds lose viability after 1–2 years.
Wrapping up and next steps
Growing moonflower bushes from seed pods is a rewarding journey that connects you to nature’s rhythms—especially when you master the art of dormancy-breaking. By following these steps, you’ll unlock next year’s vibrant blooms and enjoy the beauty of this fast-growing vine. 🌱✨
Ready to take the next step? Start by collecting seed pods this season, then store and prepare them with confidence. Before you know it, your garden will be alive with moonflowers, their delicate blossoms unfolding under the moonlight. Happy gardening!