
Lawn
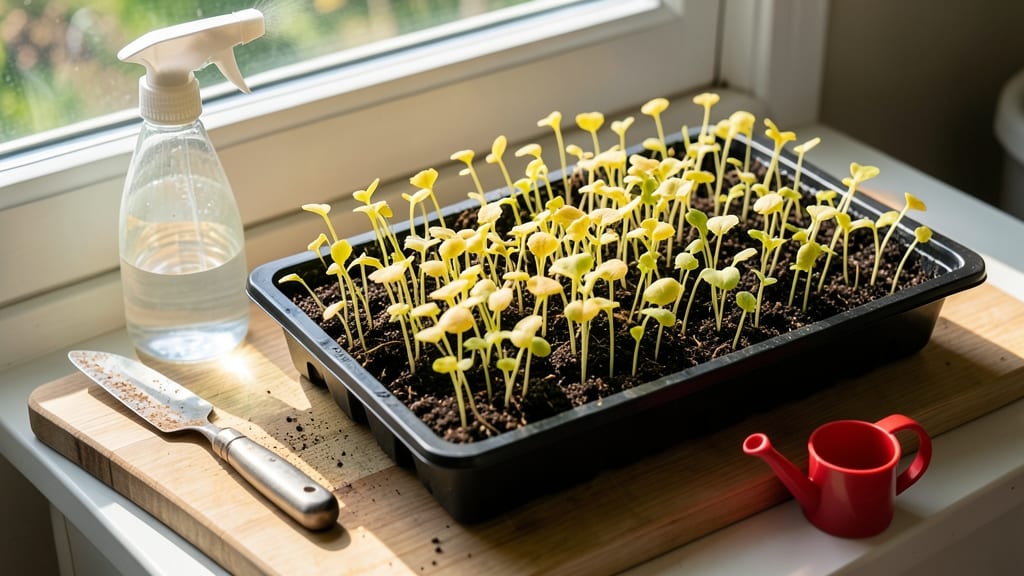
Tiny spaces deserve big blooms—and my little seed gardens prove it. 🌱 These aren’t just window boxes or balcony pots; they’re year-round displays that turn even a 2-foot square into a vibrant garden. The secret? Smart plant pairing, vertical tricks, and choosing varieties that thrive in small containers.
I started with a 6-inch-deep window box and packed it with trailing nasturtiums, dwarf marigolds, and sweet alyssum. Now, I get flowers from spring through frost with almost no maintenance. The key is picking plants that love being crowded and complement each other—like basil and tomatoes, or lettuce and radishes.
You’ll end up with a garden that’s bursting with color and fresh herbs, all while saving space. No more excuses about "not enough room"—these designs work on patios, fire escapes, or even a sunny kitchen counter. Let’s make every inch count!
First, grab lightweight containers with drainage holes—old buckets, hanging pockets, or even repurposed colanders work. Fill them with a well-draining mix (equal parts potting soil, perlite, and compost) to keep roots happy. Then, group plants by sunlight needs: sun-lovers like petunias together, shade-tolerant ferns in another spot.
The magic happens with vertical space. Use trellises for climbing beans or peas, or stack pots at different heights. My balcony now has three tiers: herbs on top, flowers in the middle, and veggies below. It’s like a living staircase of greenery, and every layer gets sunlight without overcrowding.
Don’t overthink the layout—asymmetry is fine. Mix textures (feathery dill with round lettuce) and colors (purple basil with white alyssum) for instant curb appeal. Watering is easier too: group plants with similar needs together, and you’ll spend half the time tending the garden.
Bonus: These gardens attract pollinators and deter pests naturally. The nasturtiums alone keep aphids away from my tomatoes, and the herbs repel flies. It’s a self-sustaining mini-ecosystem that fits anywhere.
📚 In This Guide
- What you need
- Instructions
- Tips and common mistakes
- Wrapping up and next steps
What you need
- ● Containers: 3–5 small pots (4–6 inches deep) or a shallow tray (for seedlings). Tip: Ensure they have drainage holes!
- ● Potting Soil: 1–2 bags of lightweight, well-draining seed-starting mix (or a blend of 60% peat moss, 30% perlite, and 10% compost).
- ● Seeds: Fast-growing, compact varieties like marigolds, nasturtiums, or cherry tomatoes (check seed packets for "dwarf" or "bush" types).
- ● Watering Can or Spray Bottle: A fine-mist sprayer works best for delicate seedlings.
- ○ Optional Tools: Trowel or small hand shovel (for transplanting).
- ● Plant labels (to track varieties).
- ● Grow lights or a sunny windowsill (if natural light is limited).
- ● Prerequisites: Access to at least 4–6 hours of sunlight daily (or a grow light setup).
- ● A warm spot (65–75°F for germination).
- ● Patience! Some seeds sprout in 3–14 days.
Step-by-step instructions for creating little seed gardens
Tiny spaces can still burst with color—here’s how to pack seasonal blooms into containers year-round.
🪴 Step 1: Choose Containers and Drainage
Select containers with drainage holes—6-inch pots work for single plants, while 12-inch troughs hold 3-4 small blooms. I prefer terra cotta because it breathes, but plastic works too if you drill extra holes. Place a 1-inch layer of gravel at the bottom to prevent root rot from soggy soil.
Test drainage by filling each container halfway with water. If it drains within 2-3 minutes, your setup is ready. Slow drainage means you’ll need to add more gravel or switch to a different pot.
🌱 Step 2: Layer Soil for Seasonal Success
Fill containers with lightweight potting mix—never garden soil, which compacts and suffocates roots. For spring/summer blooms, blend in 1 part perlite to improve drainage. For fall/winter hardy plants, add 1 tablespoon of compost per pot to boost nutrients.
Leave ½ inch of space between the soil and rim—this prevents overflow when watering. Press the mix down gently with your fingers to remove air pockets, but don’t compact it. A loose, fluffy texture lets roots spread easily.
☀️ Step 3: Plant for Year-Round Color
For spring, sow pansies or sweet alyssum—they thrive in 40-60°F and bloom until frost. In summer, switch to marigolds or zinnias, which need full sun and 65-75°F. For fall, try calendula or snapdragons, which tolerate cooler temps down to 45°F. Winter? Pansies or violas handle light frost and brighten gray days.
Space seeds ¼ inch apart and cover lightly with soil—just enough to hide them. Mist the surface with water until the soil looks evenly damp but not wet. Place containers in a humidity tray (a shallow tray with pebbles and water) to keep moisture consistent until germination.
💧 Step 4: Water and Feed Strategically
Water every 2-3 days until seedlings appear, then reduce to every 4-5 days once established. Check soil moisture by sticking your finger ½ inch deep—water when it feels dry. Overwatering is the #1 killer of tiny gardens, so always let excess water drain away completely.
Fertilize once a month with a balanced liquid fertilizer (10-10-10). Dilute it to half-strength to avoid burning delicate roots. I use a spoonful of fish emulsion in 1 gallon of water for a natural boost. Stop fertilizing 2 weeks before deadheading to encourage new blooms.
✂️ Step 5: Prune and Rotate for Longer Blooms
Deadhead spent flowers weekly by pinching off the faded bloom with your thumbnail. This tricks plants into producing more flowers instead of setting seed. For zinnias or marigolds, cut back ⅓ of the stem to encourage bushier growth—you’ll see new shoots within 7-10 days.
Rotate containers every 2 weeks so all sides get even light. You’ll notice plants leaning toward the sun? That’s your cue to move them. A slow turn prevents leggy growth and keeps blooms uniform. In late summer, reduce water slightly to harden off plants for fall transitions.
Tips & tricks for perfect container gardens
Transforming small spaces into vibrant gardens doesn't have to be complicated—just strategic. Here's how to elevate your container gardening game with these essential insights.
Container Selection Wisdom: Terra cotta pots may be your go-to, but don't overlook the benefits of fabric grow bags for seasonal plants—they breathe even better and prevent root circling. For winter gardens, opt for insulated containers with double walls to protect roots from temperature swings. The key is matching your container to the plant's seasonal needs; spring pansies need breathable pots while winter violas thrive in slightly insulated ones.
The Soil Layering Secret: When mixing your lightweight potting mix, consider adding 1 part coconut coir to the perlite blend for spring/summer plants—it retains moisture better than perlite alone while still preventing compaction. For fall/winter hardy plants, incorporate that 1 tablespoon of compost right into the bottom layer of your soil mix. This creates a nutrient-rich foundation that feeds roots as they grow upward, giving your plants a head start in cooler months.
Seasonal Plant Pairing: For maximum impact in your 12-inch troughs, pair marigolds with basil—they complement each other beautifully and naturally repel pests. In spring, combine pansies with chives for a fragrant, colorful display that continues blooming until frost. The key is selecting plants with similar light and water needs; this creates a self-sustaining microclimate within your container that requires less maintenance.
Watering Technique: The ½ inch deep soil moisture check is your best friend, but here's the pro move: use a moisture meter for your containers. These inexpensive tools give you precise readings and help you adjust your watering schedule based on actual soil conditions rather than guesswork. I've found that containers in full sun often need watering every 3-4 days even after seedlings appear, while shaded containers can stretch to every 5-6 days once established.
Pro Tips for Little Seed Gardens
- Transforming small spaces into vibrant gardens doesn't have to be complicated—just strategic. Here's how to elevate y...
- Container Selection Wisdom: Terra cotta pots may be your go-to, but don't overlook the benefits of fabric grow bags f...
- The Soil Layering Secret: When mixing your lightweight potting mix, consider adding 1 part coconut coir to the perlit...
Frequently asked questions
Can I grow a little seed garden in a small apartment or balcony?
Little seed gardens thrive in containers, window boxes, or even hanging planters. Opt for shallow-rooted plants like herbs, lettuce, or cherry tomatoes. Just ensure your space gets at least 4-6 hours of sunlight daily and use well-draining soil. A south- or west-facing spot is ideal!
When is the best time to start planting in a little seed garden?
For year-round blooms, stagger your plantings! Start with cool-season crops (like kale or spinach) in early spring or late summer. Warm-season plants (tomatoes, peppers) can go in after the last frost. In warmer climates, you might even grow year-round with shade cloth during peak heat.
Are little seed gardens more cost-effective than buying plants?
Yes—growing from seed is far cheaper! A packet of seeds costs pennies compared to nursery plants. Plus, you’ll save on water and fertilizer by tailoring care to your space. Over time, seeds pay for themselves with fresh, homegrown produce. Pro tip: Reuse containers (like yogurt cups) to cut costs even more!
How do I keep pests away from my little seed garden?
Prevention is key! Use row covers, neem oil, or companion planting (e.g., marigolds repel pests). For balconies, keep plants healthy—stressed plants attract bugs. If pests appear, handpick them or use insecticidal soap. A small garden = easier monitoring!
What if my little seed garden doesn’t grow as expected?
Don’t worry—even "failures" teach lessons! Check sunlight, water (overwatering is common!), and soil drainage. Try a simple troubleshooting guide:
- Yellow leaves? Could be overwatering or nutrient deficiency.
- Leggy plants? Needs more light.
- Slow growth? Test soil pH or add compost.
Wrapping up and next steps
Starting a little seed garden proves that even small spaces can yield big rewards—literally! Whether you’re nurturing herbs on a windowsill, growing veggies in a balcony planter, or cultivating flowers in a repurposed container, these tiny gardens are a game-changer for urban dwellers and green thumbs alike.
The key is to embrace creativity, experiment fearlessly, and enjoy the process of watching life grow from the tiniest seeds.
Ready to turn your vision into reality? Start small today! Pick one corner, one container, or even one seed variety to kick things off—your future garden (and future meals) will thank you. 🌱✨