
Lawn
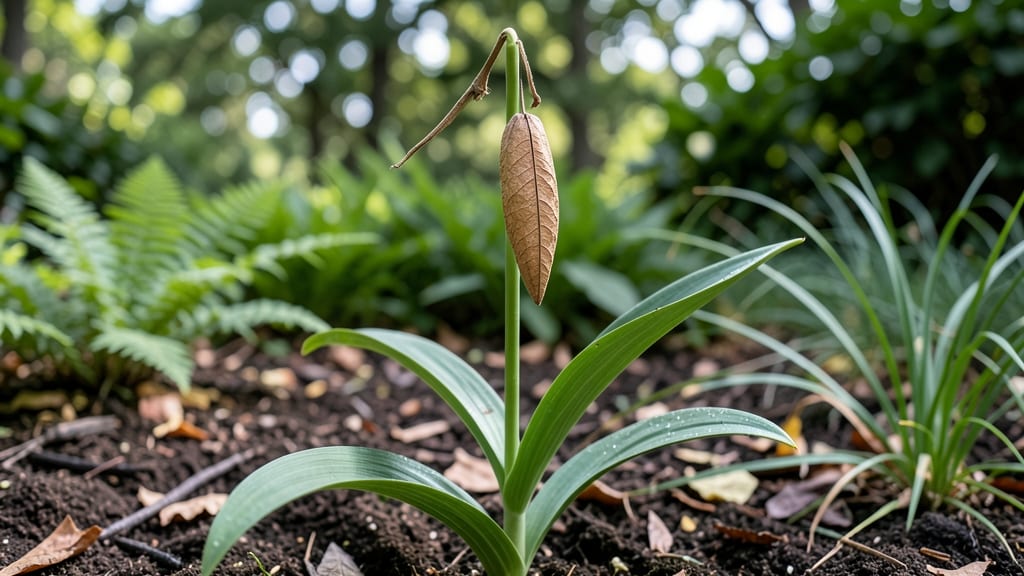
Dried lily seed pods hold the secret to free, fragrant blooms next season. 🌱 I’ve grown lilies from seed for years, and the moment I spot those papery pods turning brown in late summer, I know spring’s beauty is already in my hands.
The process is slower than buying plants, but the satisfaction—and the unique varieties—make it worth every week of waiting.
You’ll need patience, a warm spot, and a little soil. After collecting pods, let them dry completely, then crack them open to reveal tiny black seeds. Plant them shallowly in moist soil, and keep them warm until sprouts appear—usually in 4-6 weeks.
Most gardeners give up here, but sticking with it pays off when those first true leaves appear, signaling a lily’s future.
By next summer, you’ll have sturdy young plants ready to bloom, often with colors and patterns you’d never find in nurseries. The key is consistency: keep soil moist but not soggy, and protect seedlings from slugs.
Once established, these lilies will multiply and return year after year, turning your garden into a showstopper.
Perfect for gardeners who love a challenge or want to experiment with rare varieties. Here’s how to turn those pods into plants that’ll thrive for decades—no green thumb required, just persistence. Let’s get those seeds sprouting!
📚 In This Guide
- What you need
- Instructions
- Tips and common mistakes
- Wrapping up and next steps
What you need
- ● Mature lilly seed pods: 3–5 fully dried, intact pods (harvested from a healthy Lilium plant, like Lilium asiaticum or Lilium longiflorum).
- ● Potting soil: 1–2 bags of well-draining, sterile potting mix (look for labels like "seed-starting mix" or "cactus/succulent blend").
- ● Containers: Small pots (4–6 inches deep) for seed germination: 3–5 containers (one per pod or shared if space is tight).
- ● Larger pots (10+ inches) for mature plants: 1–2 containers (if growing multiple plants).
- ○ Growing trays or seed trays: Optional but helpful for organizing seeds during germination.
- ● Spray bottle: For gentle watering to avoid disturbing seeds.
- ● Plant labels: Small sticks or markers to track varieties and planting dates.
- ● Grow lights: LED or fluorescent lights for seedlings if natural light is limited (12–16 hours/day).
- ● Heating mat: A seedling heat mat (55–75°F) to speed up germination in cooler climates.
- ● Fertilizer: A balanced, water-soluble fertilizer (5-10-5 ratio) for transplanting.
- ● Mulch or pebbles: To retain moisture and improve drainage in pots.
- ● Gloves: To protect hands when handling dried pods (some varieties have mild irritants).
Step-by-step instructions for growing lilies from seed pods
Transform those dried seed pods into stunning lilies with this simple, rewarding process.
🌱 Step 1: Harvest and Prepare the Seed Pods
Collect mature, dried seed pods from your existing lilies—wait until they turn brown and begin splitting open naturally. This usually happens in late summer or early fall. Gently twist the pods to release the black, bean-shaped seeds inside. Store them in a paper envelope in a cool, dry place until ready to plant.
Don't rush to plant them immediately. Fresh seeds need a period of dormancy to break properly. I like to let them rest for at least 2-3 months before sowing. This mimics their natural cycle and improves germination rates significantly.
💧 Step 2: Stratify Seeds for Better Germination
Place the seeds in a sealed plastic bag with a damp paper towel. Store them in your refrigerator's vegetable crisper for 8-12 weeks. This cold stratification mimics winter conditions and helps break seed dormancy. Check occasionally to ensure the towel stays moist but not soggy.
You'll know stratification is working when the seeds begin to swell slightly. This usually happens after about 6-8 weeks. At this point, you can proceed with planting. Real talk: If you skip this step, germination may take twice as long or fail entirely.
☀️ Step 3: Plant Stratified Seeds in Containers
Fill small pots with a well-draining mix of 50% potting soil and 50% perlite. Plant the stratified seeds about 1 inch deep, spacing them 2 inches apart. Water gently until the soil is moist but not waterlogged. Place the pots in a warm, bright location that receives indirect sunlight.
Keep the soil consistently moist during germination, which typically takes 4-8 weeks. You'll see tiny green shoots emerge first, followed by the first true leaves. This is the moment that matters—once you spot those leaves, move the pots to a location with bright, indirect light for the next growth phase.
🌿 Step 4: Transplant Seedlings When Ready
After the seedlings have developed 3-4 true leaves and are about 3-4 inches tall, it's time to transplant them. Choose a location with full sun (at least 6 hours daily) and well-draining soil. Dig holes slightly larger than the root ball and space the seedlings 12-18 inches apart.
Water deeply after transplanting to help the roots establish. Mulch around the base with 2-3 inches of organic mulch to retain moisture and regulate soil temperature. Lilies are tough plants, but they appreciate consistent care during their first year to build strong roots for future blooms.
⏰ Step 5: Care for Young Lilies Through First Year
Keep the soil evenly moist but not soggy, especially during the first growing season. Lilies are drought-tolerant once established, but young plants need consistent moisture. Water at the base of the plant to avoid wetting the foliage, which can lead to fungal issues.
Fertilize lightly in early spring with a balanced, slow-release fertilizer to encourage healthy growth. Avoid heavy feeding, as this can lead to excessive foliage at the expense of flower development. By the second year, your lilies should start producing those beautiful blooms you fell in love with!
Tips & tricks for perfect lily seed pod growth
Growing lilies from seed pods is a rewarding process, but these small details make all the difference between success and frustration.
Dormancy is Non-Negotiable: That 2-3 month rest period before planting isn't optional—it's what breaks the seeds' natural dormancy. I've tried planting fresh seeds and watched them rot in the soil. Store them in a paper envelope in a cool, dark place like a closet or basement. The paper allows for minimal airflow while protecting them from moisture.
Stratification Success: During the 8-12 week cold stratification in Step 2, check your seeds every 2 weeks. The damp paper towel should stay moist but never dripping wet—think of it like a wrung-out sponge. If you notice mold, toss those seeds and start fresh. The 6-8 week swelling point is your green light to plant, but don't rush it. Patience here pays off with stronger seedlings.
Lighting Strategy: In Step 3, when you're keeping seeds in indirect light, place your pots near an east-facing window where they'll get gentle morning sun. If you don't have good natural light, a simple grow light on a timer (12-14 hours/day) works wonders. The moment you see those first true leaves, move them to brighter light—but not direct midday sun, which can scorch tender seedlings.
Transplanting Timing: Wait until you see 3-4 true leaves and the seedlings are 3-4 inches tall before transplanting. I know it's tempting to rush this step, but stronger roots develop when plants have established a good leaf system first. When you do transplant, water deeply right after to help the roots settle into their new home.
Pro Tips for Lilly Seed Pod
- Growing lilies from seed pods is a rewarding process, but these small details make all the difference between success...
- Dormancy is Non-Negotiable: That 2-3 month rest period before planting isn't optional—it's what breaks the seeds' nat...
- Stratification Success: During the 8-12 week cold stratification in Step 2, check your seeds every 2 weeks. The damp ...
Frequently asked questions
Got questions about growing lily seed pods?
You’re not alone! Whether you’re a first-time gardener or a seasoned green thumb, these answers will help you navigate the process with confidence. Let’s dive in!
How long does it take for lily seed pods to germinate?
Germination can take anywhere from 2 to 6 weeks, depending on conditions like soil temperature (ideal: 60–75°F) and moisture. Keep the soil consistently damp but not soggy, and place the pods in a warm, bright spot. Patience is key—some varieties may take longer!
When is the best time to plant lily seed pods?
For fastest results, plant them in early spring after the last frost or in late summer (6–8 weeks before the first frost). This gives roots time to establish before winter. If you’re in a warm climate, fall planting can also work—just ensure the soil stays moist.
Can I grow lily seed pods indoors?
Start them in small pots with well-draining soil and place them near a sunny window or under grow lights. Once seedlings sprout (usually in 2–4 weeks), transplant them outdoors after the last frost. Just be mindful of temperature shifts—lilies prefer gradual acclimation.
What do I do if my seed pods rot before germinating?
Rot is often caused by too much moisture or poor drainage. If you notice mold or a foul smell, remove the affected pods and repot the healthy ones in fresh, sterile soil. Use a mix with perlite or sand to improve aeration. Keep the environment warm and humid but avoid overwatering!
Are there alternatives to growing from seed pods?
Yes! If you’re eager for blooms, consider dividing established lilies or buying potted lily bulbs from nurseries. These methods deliver faster results (often blooming in the first year), while seed pods can take 2–3 years to mature. Both options are great—choose based on your timeline!
Wrapping up and next steps
Growing lily seed pods is a rewarding journey that brings beauty and life to your garden year-round! 🌱 Whether you’re reviving dried pods or nurturing fresh ones, the key lies in patience, proper care, and a little creativity.
With the right techniques, you’ll soon enjoy vibrant blooms and unique textures that elevate any outdoor space.
Ready to take the next step? Start by gathering your supplies, follow the steps with confidence, and don’t hesitate to experiment with placement or varieties. Your garden—and future blooms—will thank you! Happy growing! 🌸