
Lawn
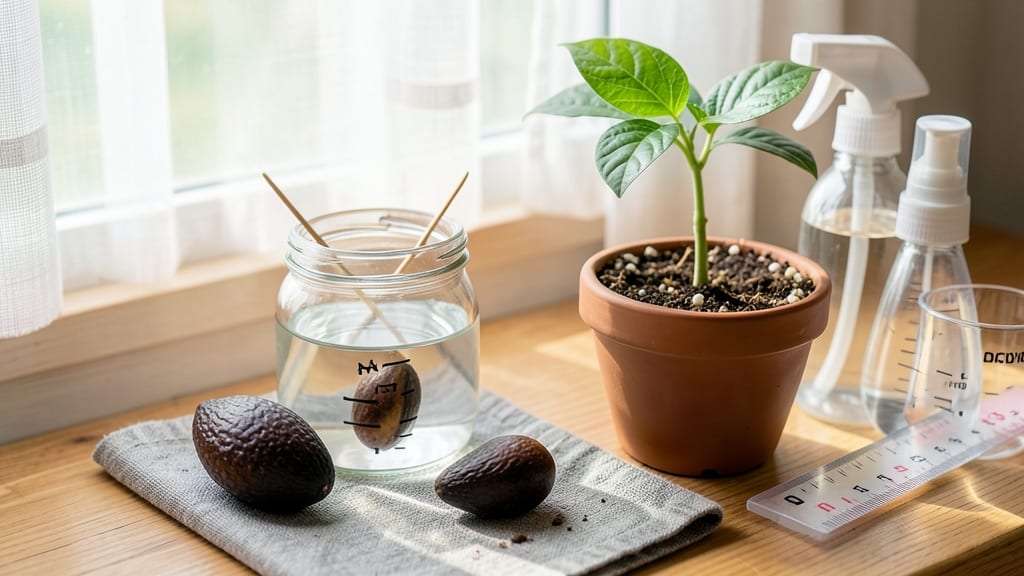
How to prepare an avocado seed for planting could turn into a rewarding indoor gardening project with just a toothpick and some patience. 🌱 This isn't just a fun science experiment—it’s a chance to grow something from scratch that’ll thrive in your home for years. The key is starting right, and I’ve learned the hard way which steps make all the difference between a wilted seedling and a sturdy plant ready for a pot.
You’ll need just three things: a fresh avocado pit, a glass of water, and a few toothpicks (or skewers). The toothpick method keeps the seed upright in water while roots sprout—no fancy tools required.
Most seeds start showing roots in 2-6 weeks, but consistency is everything. Keep the water level steady, and avoid letting the pit dry out, which is where beginners usually fail.
Once roots hit 2-3 inches, you’ll transplant it into soil, where it’ll grow into a tree with glossy leaves and that classic avocado vibe. The real magic happens when you see those first true leaves—it’s proof you’re doing it right.
Just remember, this isn’t a race; some seeds take longer, and that’s okay.
If your seedling stalls or the leaves yellow, it’s usually overwatering or poor light. Move it to a bright spot (but not direct sun) and let the top inch of soil dry between waterings. With care, your avocado plant could live for decades, becoming the centerpiece of your indoor jungle.
📚 In This Guide
- What you need
- Instructions
- Tips and common mistakes
- Wrapping up and next steps
What you need
- ● 1 fresh avocado pit – Choose a seed from a healthy, organic avocado if possible.
- ● Toothpicks (3-4) – For balancing the seed during germination.
- ● Small glass or jar – A clear container (8-12 oz) with a wide enough opening to fit the seed.
- ● Water – Room-temperature, filtered water for soaking.
- ● Paper towels or coffee filters – To keep the seed moist during germination.
- ● Potting soil – Well-draining, organic soil mix (e.g., cactus or succulent blend).
- ● Small pot (4-6 inches in diameter) – With drainage holes to prevent root rot.
- ○ Rooting hormone – Speeds up root development (optional but recommended for beginners).
- ● Spray bottle – For misting the seedling without overwatering.
- ● Grow lights or sunny windowsill – Ensures proper light exposure for early growth.
- ● Humidity dome or plastic wrap – Helps maintain moisture during the initial stages.
- ● Fertilizer (balanced, diluted) – Introduce after 2-3 months for stronger growth.
Step-by-Step guide to sprouting an avocado seed
Here's how I turn a simple pit into a thriving seedling—no fancy tools needed.
🪴 Step 1: Remove the Seed and Clean It Thoroughly
Start by cutting the avocado in half lengthwise. You'll see the seed nestled inside—it's that brown, oval shape surrounded by soft fruit. Gently pry it free using a knife, then rinse it under cool water to remove any remaining fruit residue. The cleaner the seed, the better it will germinate.
Here's the thing—don't rush this step. Scrub the seed with your fingers or a soft brush to remove all traces of the fruit. You're not just cleaning; you're preparing the seed to breathe. Any leftover fruit can attract mold or pests, so take your time. Once it's spotless, let it air-dry completely for about 10-15 minutes on a paper towel.
✂️ Step 2: Insert Toothpicks and Suspend the Seed
Place the dried seed between three toothpicks—position them evenly around the middle, about ¼ inch apart. The toothpicks should hold the seed steady without piercing it. This setup allows the seed to hang over a glass of water without touching the bottom, which is key for germination.
Now, balance the seed on the rim of a glass filled with 2-3 inches of water. The bottom ¼ inch of the seed should dip into the water, but the top should stay dry. If the seed sinks too low, it'll rot. If it's too high, it won't absorb enough moisture. You'll know it's right when the waterline just kisses the base.
💧 Step 3: Position for Germination and Monitor Water Levels
Place the glass in a warm, bright spot—65-75°F is ideal, like a sunny windowsill or under a grow light. Avoid direct sunlight, which can overheat the seed. Check the water daily and top it off to keep the base submerged. You'll see roots emerge within 2-6 weeks, depending on temperature and humidity.
Here's what to watch for: the first sign of life is a tiny white root breaking through the bottom. Once it reaches 1-2 inches long, that's your cue to act. Don't let the water level drop too low, or the root will dry out. If mold appears on the water, dump it and refill with fresh water—mold means it's time for a reset.
🌱 Step 4: Transition to Soil Once Roots Are Established
When the root reaches 2-3 inches, it's time to plant. Fill a small pot (4-6 inches wide) with well-draining potting mix, leaving ½ inch of space at the top. Gently lower the seed into the soil so the root is buried 1 inch deep, and the top half of the seed remains exposed. This prevents rot while encouraging the stem to grow upward.
Water lightly until the soil is moist but not soggy. Place the pot in bright, indirect light—avoid harsh sunlight at first, which can scorch the new shoot. Within 1-2 weeks, you should see the first true leaves unfurl. That's your signal the seedling is thriving. Real talk: the first leaves might look odd, but they'll mature into lush, healthy foliage.
☀️ Step 5: Gradually Acclimate to Sunlight and Care
After 2-3 weeks in soil, start introducing the seedling to morning sunlight for 1-2 hours daily. This slows down the transition and prevents leaf burn. Over 10-14 days, increase the sunlight exposure until it can handle 4-6 hours of indirect light per day. Once the seedling has 4-5 leaves, you can move it to a sunny windowsill or outdoor shaded spot for 6+ hours of light.
Water when the top inch of soil feels dry—stick your finger in to check. Overwatering is the biggest killer of young avocado seedlings, so let the soil dry slightly between waterings. You'll know you're doing it right when the seedling grows new leaves consistently and the stem stays sturdy. Patience here pays off—rushing leads to leggy, weak plants.
Tips & tricks for sprouting avocado seeds
These simple tricks will help you avoid common pitfalls and give your avocado seed the best chance to thrive.
Cleaning is Critical: In Step 1, don't just rinse the seed—scrub it thoroughly with your fingers or a soft brush. I learned this the hard way after seeing mold develop from leftover fruit residue. A clean seed breathes better and germinates faster. The 10-15 minute drying time is non-negotiable—this prevents rot when you move to water.
Toothpick Placement Matters: When inserting toothpicks in Step 2, position them about ¼ inch apart around the seed's middle. Too close together and they'll dig in; too far apart and the seed won't stay balanced. I recommend using toothpicks with slightly rounded tips to prevent puncturing. The seed should hover just above the waterline—this is your visual cue for proper setup.
Temperature and Light Balance: The 65-75°F range in Step 3 is ideal, but consistency matters more than exact degrees. If your home runs cooler, place the seed near a sunny window during the day and move it away at night. Direct sunlight can overheat the seed, while too little light slows germination. I've seen roots emerge in as little as 2 weeks in warm conditions, but 6 weeks is normal—patience is key!
Soil Transition Timing: Wait until roots reach 2-3 inches before planting in Step 4. This might take 3-4 weeks depending on conditions. When you do plant, bury only 1 inch of the root—exposing the top half prevents rot while encouraging upward growth. Use a pot with drainage holes to avoid waterlogged soil, which is the #1 killer of young seedlings.
Pro Tips for Prepare An Avocado Seed For Planting
- These simple tricks will help you avoid common pitfalls and give your avocado seed the best chance to thrive.
- Cleaning is Critical: In Step 1, don't just rinse the seed—scrub it thoroughly with your fingers or a soft brush. I l...
- Toothpick Placement Matters: When inserting toothpicks in Step 2, position them about ¼ inch apart around the seed's ...
Frequently asked questions
Got questions about turning that avocado pit into a thriving plant? Here are some of the most common ones—plus quick, practical answers to keep your green thumb growing!
How long does it take for an avocado seed to sprout?
Patience is key! With the right conditions (warmth, moisture, and indirect light), your avocado seedling may sprout in 2–6 weeks. Some take longer—don’t rush it. Once you see roots (3–6 inches) and a tiny sprout, it’s time to plant it in soil.
Can I plant an avocado seed straight in soil without germinating it first?
Technically yes, but success rates drop dramatically. Pre-sprouting in water (the toothpick method) gives roots a head start and protects the seed from rot. If you skip this step, bury the seed horizontally in moist soil, 1–2 inches deep, and wait for nature to work its magic.
What’s the best soil mix for an avocado seedling?
Avocado seedlings thrive in well-draining, slightly acidic soil (pH 6.0–7.0). Mix 60% potting soil, 30% perlite or sand, and 10% compost for ideal growth. Avoid heavy clay—it suffocates roots and causes rot.
My avocado seed is moldy or smelly—what do I do?
Toss it! Mold (fuzzy white/green) or a rotten, sour smell means bacterial/fungal infection. To prevent this, change water every 2–3 days, keep the seed in warm (not cold) water, and avoid overcrowding in the jar.
Can I grow an avocado tree indoors year-round?
Yes! Avocados adapt well to bright, indirect light (near a south-facing window) and humidity. Keep temps between 65–80°F, mist leaves occasionally, and rotate the pot monthly for even growth. Just know: indoor trees may stay small and take 5–13 years to bear fruit!
Will my homegrown avocado tree produce fruit like grocery store avocados?
Probably not—most homegrown trees are self-pollinating but low-yielding. For fruit, you’d need two trees (or a grafted variety) and years of care. Focus on the fun of growing a tropical houseplant first!
Wrapping up and next steps
Preparing an avocado seed for planting is a fun, rewarding project that can bring a touch of greenery to your home—and it’s easier than you think! 🌱 By following these simple steps, you’ve got everything you need to nurture a thriving avocado tree from a humble pit.
Whether you’re a beginner or a seasoned plant parent, this process is a great way to connect with nature and enjoy the satisfaction of growing something from scratch.
Now that you’re ready to plant, why not take the next step? Keep an eye on your seedling’s growth, and soon, you might even be harvesting your own avocados! Share your progress with fellow plant lovers or explore more gardening tips to expand your green thumb. Happy planting! 🌿