
Planting
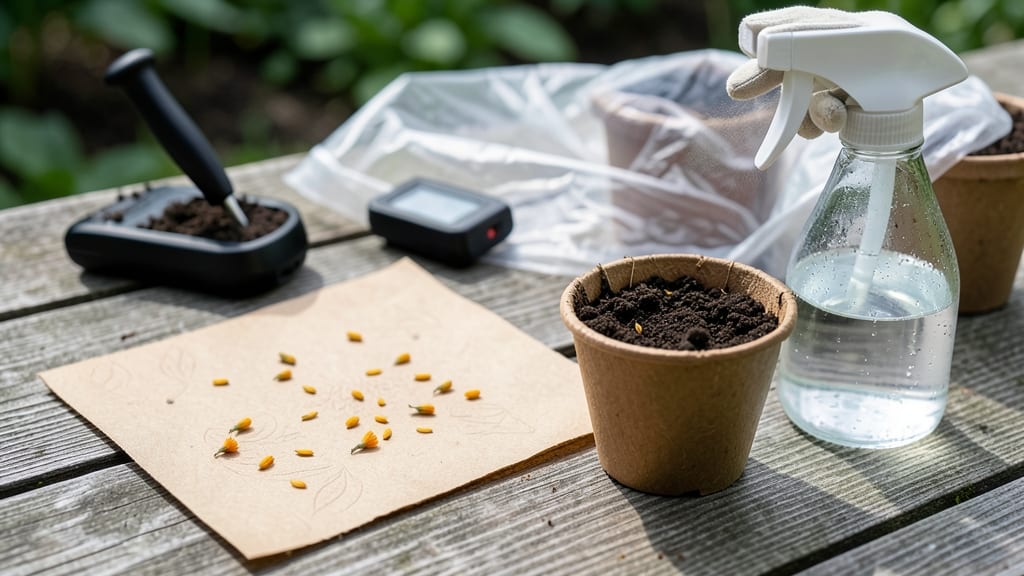
Planting seed paper transforms your garden into a living canvas of wildflowers—no soil prep needed. 🌱 The secret lies in its moisture-locked design, which keeps seeds hydrated until roots find purchase.
I’ve used this method to fill bare spots in my garden with vibrant blooms in just 60 days, and the best part? It’s beginner-friendly and eco-conscious. Start with a flat tray or shallow container filled with damp potting mix.
Lay your seed paper on the surface, pressing lightly to ensure contact. The paper dissolves naturally, releasing seeds into the soil—no digging required. Just keep the soil consistently moist (not soggy) and place the tray in bright, indirect light until sprouts appear.
Once seedlings reach 2-3 inches, transplant them into your garden bed or container. The paper breaks down completely, leaving no trace behind. You’ll see the first blooms in about 6-8 weeks, and the colors will be shockingly lush compared to store-bought flowers.
Perfect for filling gaps, creating pollinator-friendly borders, or even gifting living plants. The method works year-round in mild climates, and the seeds stay viable for up to 2 years if stored dry.
📚 In This Guide
- What you need
- Instructions
- Tips and common mistakes
- Wrapping up and next steps
What you need
- ● Wildflower or herb seeds – 1–2 teaspoons (organic, untreated seeds work best; choose fast-growing varieties like marigolds, basil, or clover).
- ● Unbleached paper pulp – 1 sheet (8.5x11 inches) or pre-made seed paper base (cotton or recycled paper works too).
- ● Water – ¼ cup (room temperature).
- ● Blender – High-speed (for pulping paper if starting from scratch).
- ● Fine-mesh sieve or colander – For straining pulp (hole size: ~1mm).
- ● Spray bottle – Mist function (to keep pulp moist).
- ● Baking sheet or flat surface – Covered with parchment paper.
- ● Rolling pin or smooth object – For flattening (a water bottle works in a pinch!).
- ○ Drying rack or airtight container – For curing (optional but recommended).
- ● Acrylic paint or natural dyes – For custom designs (food-safe if edible plants are used).
- ● Stencils or cookie cutters – For shaped seed paper (hearts, stars, or custom logos!).
- ● Hair dryer (low heat) – To speed up drying (avoid direct heat!).
- ○ Planting tray or biodegradable pot – For pre-germination (optional but helpful).
- ● Compost or soil mix – For planting (well-draining potting soil recommended).
- ● Misting spray bottle – For post-planting care (keeps seeds hydrated).
Step-by-Step instructions for planting seed paper
Here's my foolproof method for transforming seed paper into vibrant blooms—no gardening experience required.
🌱 Step 1: Prepare Your Planting Site
Choose a location with partial shade to full sun—most seed paper varieties thrive in 4-6 hours of sunlight daily. I like to test soil moisture first by pressing my finger 1 inch deep—if it feels dry, water thoroughly 24 hours before planting. This ensures the paper absorbs moisture immediately upon contact.
Clear the area of weeds or debris, then lightly rake the soil to create a smooth, even surface. If planting in containers, use pots with drainage holes and fill them with well-draining potting mix. The key here is avoiding soggy conditions—seed paper rots if waterlogged.
💧 Step 2: Soak and Position the Seed Paper
Place your seed paper in a shallow tray or bowl of lukewarm water for 10-15 minutes until fully saturated—you'll see the edges curl slightly as they absorb moisture. This step is critical; under-soaking delays germination, while over-soaking can damage seeds. I tap the paper gently to encourage even saturation.
Remove the paper and let excess water drain for 2-3 minutes. Then, unfold it and press it firmly into the prepared soil, smoothing out any wrinkles. For containers, lay it flat at the bottom before adding a thin layer of soil on top—this mimics natural seed dispersal. You'll know it's positioned correctly when the paper lies flat without curling.
☀️ Step 3: Maintain Moisture and Light Conditions
Keep the soil consistently moist for the first 2-3 weeks—this is when roots establish and seeds germinate. I use a spray bottle to mist lightly daily rather than watering from above, which can displace the paper. Watch for the first tiny green shoots emerging in 7-14 days; this confirms successful planting.
Once sprouts appear, reduce watering to every 2-3 days, allowing the top inch of soil to dry slightly between waterings. Seed paper thrives in moderate sunlight—gradually introduce it to full sun over 5-7 days to prevent leaf scorch. You'll notice leaves developing a deeper green color as they acclimate.
✂️ Step 4: Transplant and Encourage Growth
After 4-6 weeks, when seedlings reach 2-3 inches tall with 3-4 true leaves, gently lift them from the paper and transplant into their permanent location. I use a small trowel to carefully separate roots, then place each seedling 6-8 inches apart in the ground or container.
Fertilize lightly with a balanced, water-soluble fertilizer diluted to half-strength to avoid burning tender roots. Seed paper decomposes naturally, so no additional organic matter is needed. Watch for blooms to appear in 60-90 days, depending on the variety—your patience will pay off with vibrant, long-lasting flowers.
⏰ Step 5: Harvest and Maintain Blooms
Harvest flowers in the morning when moisture levels are lowest, cutting stems at a 45-degree angle just above a leaf node to encourage bushier growth. I like to arrange them in vases with lukewarm water to extend their lifespan—seed paper blooms often last 7-10 days in water.
After flowering, deadhead spent blooms by pinching them off at the base. This redirects the plant's energy into root and foliage growth, ensuring stronger plants for next season. If you're growing annual varieties, let some flowers go to seed to create new seed paper for future plantings—it's a rewarding cycle.
Tips & tricks for planting seed paper
Transforming seed paper into thriving blooms isn't rocket science—but these pro tips will help you avoid the most common pitfalls and maximize your success rate.
Soil Moisture Secret: The 24-hour pre-watering tip in Step 1 isn't just about moisture—it's about creating the perfect environment for immediate absorption. I've found that adding a handful of perlite to your planting area before placing the seed paper helps prevent compaction and improves drainage, especially in heavier soils. This ensures roots establish quickly without sitting in soggy conditions.
Timing is Everything: Those 10-15 minutes of soaking in Step 2 might seem short, but every second counts. I recommend using a kitchen timer and testing saturation by gently pressing the paper—it should feel pliable but not dripping. If you're planting multiple sheets, soak them one at a time to maintain water temperature consistency, which affects germination rates.
Sunlight Transition Strategy: The gradual sun introduction over 5-7 days in Step 3 prevents leaf scorch that can kill young seedlings. Here's my trick: start by placing your seedlings in a spot with morning sun only, then slowly move them to include afternoon sun over the week. You'll notice the leaves develop a richer green color as they acclimate, which is your cue that they're ready for full sun exposure.
Transplanting Technique: When lifting seedlings from the paper in Step 4, I use a small butter knife to gently separate the roots from the paper fibers. This minimizes root disturbance while still encouraging the seedlings to grow away from the paper. The 6-8 inch spacing isn't just arbitrary—it accounts for most seed paper varieties' mature width, preventing overcrowding that leads to competition for nutrients.
Pro Tips for Plant Seed Paper
- Transforming seed paper into thriving blooms isn't rocket science—but these pro tips will help you avoid the most com...
- Soil Moisture Secret: The 24-hour pre-watering tip in Step 1 isn't just about moisture—it's about creating the perfec...
- Timing is Everything: Those 10-15 minutes of soaking in Step 2 might seem short, but every second counts. I recommend...
Frequently asked questions
Got questions about seed paper? You’re not alone—this eco-friendly planting method is full of surprises! Here are the answers to the most common queries to help you grow with confidence.
What’s the best time of year to plant seed paper?
Plant seed paper after the last frost when soil temperatures are consistently above 60°F (15°C). Spring or early summer is ideal, but check your local frost dates—seed paper blooms best in warm, stable conditions. For cooler climates, wait until daytime temps stay above 50°F (10°C).
How often should I water seed paper?
Keep the soil consistently moist (not soggy) for the first 2–3 weeks. Water gently 1–2 times daily if rainfall is light, focusing on the base. Once sprouts emerge, reduce to every other day unless the top inch of soil feels dry. Overwatering can drown seeds—drainage is key!
Can I plant seed paper indoors or in containers?
Seed paper thrives in 6-inch pots, hanging baskets, or even vertical planters. Use well-draining soil and place containers in bright, indirect light (like a sunny windowsill). Just ensure pots have drainage holes—stagnant water is the #1 enemy of seed paper success.
What if my seed paper freezes or gets too hot?
Seed paper is hardy but not frost-proof. If temps drop below 32°F (0°C), cover plants with a frost cloth or move pots indoors. For heatwaves, shade seedlings with a sheer curtain to prevent wilting. Pro tip: Monitor weather forecasts—seed paper can’t bounce back from extreme cold or scorching sun!
Why aren’t my seeds sprouting? Troubleshooting tips!
If your seed paper stays dormant, check these fixes:
- Moisture: Press the paper firmly into damp soil—it needs direct contact with water.
- Light: Place in bright, indirect light (no deep shade).
- Patience: Some varieties (like wildflowers) take 3–4 weeks to sprout.
- Viability: If older than 1 year, seeds may have lost potency—start fresh!
Still stuck? Try a warm water soak (10 mins) before replanting to kickstart germination.
Wrapping up and next steps
Planting seed paper is a rewarding way to grow vibrant blooms with minimal effort—no soil, no fuss, just easy, eco-friendly gardening! 🌱 By following these steps, you’ll unlock a world of low-maintenance plants in just 60 days, perfect for beginners or busy gardeners.
Now that you’re armed with the know-how, why not start small? Try a few sheets in a sunny spot, experiment with different flowers, and watch your green thumb grow—literally!
Next step: Grab your seed paper, pick a sunny window or balcony, and let nature do the rest. Happy planting! 🌸