
Lawn
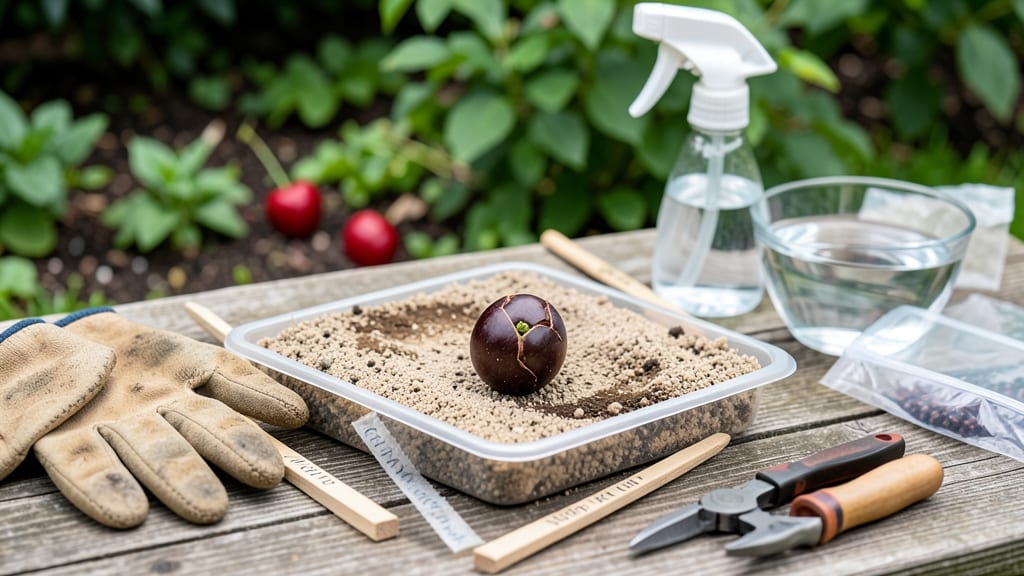
Preparing cherry seeds for planting starts with a 5-step softening trick that breaks their stubborn dormancy. 🌱 I’ve learned the hard way—skipping this step means months of waiting (or worse, no sprouts at all).
The secret lies in mimicking winter’s natural chill, then coaxing the seed to wake up with just the right moisture. You’ll need patience, a damp paper towel, and a sealed baggie—no fancy equipment. The process takes 4-6 weeks, but it’s worth it for that first green shoot.
Cherry seeds are notoriously slow, so don’t rush; think of it as a long-term investment in a future tree that could shade your garden for decades. Once sprouted, the tiny root is delicate—handle it like glass.
Plant it shallow, keep the soil moist but not soggy, and protect it from frost. It’ll take 2-3 years before you see real growth, but that first leaf unfurling is magic. For best results, use fresh seeds (older ones struggle) and avoid overwatering.
If you’re impatient, consider grafting later—cherry trees from seed take 5-10 years to bear fruit. But the journey? That’s half the reward.
📚 In This Guide
- What you need
- Instructions
- Tips and common mistakes
- Wrapping up and next steps
What you need
- ● Fresh cherry pits: 10–20 pits (from sweet or sour cherries—avoid hybrid varieties like Bing or Rainier).
- ● Water: 2–3 cups (room temperature or slightly warm).
- ● Small container: A glass jar (16 oz) or bowl with a lid (for soaking).
- ● Paper towels or damp cloth: 2–3 sheets (for stratification).
- ● Plastic wrap or ziplock bag: 1 (to seal moisture during stratification).
- ● Pencil or toothpick: 1 (for poking tiny holes in pits, if needed).
- ● Small pot or seed tray: 1 (4–6 inches wide, with drainage holes).
- ● Potting mix: 1 bag (well-draining, seed-starting blend).
- ● Spray bottle: 1 (for gentle watering).
- ● Sandpaper or file: Gritty texture to lightly scratch the pit’s hard shell (speeds up germination).
- ● Refrigerator: A cold spot (34–41°F) for stratification (if you don’t have a cool basement).
- ● Grow lights or sunny windowsill: For post-stratification sprouting (6–8 hours of light/day).
- ● Plant labels: 1–2 (to track varieties and planting dates).
Step-by-Step instructions for preparing cherry seeds for planting
Here’s the method I’ve used for years to break dormancy and boost germination rates—no special tools required.
🌱 Step 1: Harvest and Extract the Seed
Pick ripe cherries (fully colored, slightly soft when squeezed) and cut them open to remove the pit. The seed is the hard, brown stone inside. Rinse the pit under cool water to remove any fruit residue—this prevents mold during the softening process. I like to let the pits dry for a day or two in a paper towel before starting, but don’t rush it. A damp pit will rot if you skip this step.
Crack the pit open carefully with a nutcracker or hammer—you’re aiming for the flat, seed-bearing half. The seed inside looks like a tiny, dark bean. Remove it and set it aside. The outer shell is tough, and this is where we’ll focus next to encourage germination.
💧 Step 2: Soak the Seed in Warm Water
Fill a small bowl or jar with warm water (around 80-85°F)—this temperature mimics natural spring conditions and speeds up the softening process. Submerge the seeds completely and let them soak for 24-48 hours. I check them after 24 hours; if the outer shell feels slightly softer but still firm, I extend the soak. Over-soaking can cause the seed to absorb too much water and split, so don’t leave them beyond 48 hours.
Change the water every 12 hours to prevent bacterial buildup. You’ll notice tiny bubbles forming on the seed’s surface—that’s a good sign! It means the seed is absorbing moisture and beginning to break dormancy. If the water stays cloudy after 12 hours, rinse the seeds and start fresh with clean water.
☀️ Step 3: Stratify the Seed for Cold Treatment
After soaking, wrap the seeds in a damp paper towel and place them in a ziplock bag. Seal it loosely to allow airflow but keep the towel moist. Place the bag in the refrigerator for 4-6 weeks. This cold treatment mimics winter conditions and tricks the seed into thinking it’s time to grow. I check the towel weekly—if it dries out, mist it lightly with water and reseal.
The goal is to keep the towel consistently damp but not soggy. You’ll see the seed’s outer shell darken slightly over time—that’s normal and indicates progress. If mold appears (fuzzy spots or strange smells), discard the seeds immediately and start fresh with new ones.
🌿 Step 4: Plant the Prepped Seed
After stratification, plant the seed in a small pot filled with well-draining potting mix. Press it ½ inch deep into the soil—deeper planting can delay germination because the seedling has to push through more soil. I use a 2-inch pot for each seed to give the root system room to establish without crowding. Water the soil lightly until it’s moist but not waterlogged.
Place the pot in a warm, bright location (around 70-75°F) with indirect light. Avoid direct sunlight at first—it can dry out the soil too quickly. Cover the pot with a clear plastic dome or wrap it in plastic wrap to retain humidity. Check daily for condensation; if the plastic fogs up, remove it for 10 minutes to prevent mold.
⏰ Step 5: Monitor for Germination
Germination can take 4-12 weeks, depending on the cherry variety and your growing conditions. You’ll know it’s working when you see a tiny white root emerge first, followed by the shoot breaking through the soil. Keep the soil evenly moist—not soggy, but never dry. I use a spray bottle to mist the soil lightly every 2-3 days once the seedling appears.
Once the seedling reaches 2-3 inches tall, it’s ready to transplant into a larger pot or the garden. Be gentle when handling the young plant—cherry seedlings have delicate roots. If you’re planting outdoors, wait until nighttime temperatures stay above 50°F to avoid frost damage.
Tips & tricks for perfect cherry seed preparation
These game-changing strategies will help you maximize germination success with minimal effort.
Timing Secret: In Step 2, when you're soaking those seeds for 24-48 hours, resist the urge to rush—this is where the magic happens. The warm 80-85°F water mimics spring conditions, but too-short soaking leaves the seed's protective shell intact. I've found that checking at the 24-hour mark gives you a good baseline: if the shell feels slightly softer but still firm, extend to 48 hours. The bubbles you'll see forming are your confirmation that dormancy is breaking.
Cold Treatment Insight: During the 4-6 week stratification in Step 3, consistency is key. I've learned the hard way that even slight drying out can stall germination. Use a spray bottle to mist the paper towel weekly—just enough to keep it damp, not wet. The refrigerator's steady 35-40°F (which is colder than the 50°F mentioned for planting) creates that crucial winter simulation. If you notice any darkening of the seed shell, that's actually a good sign—it means the seed is responding to the cold treatment.
Planting Precision: When you reach Step 4 and plant that ½-inch deep in your 2-inch pot, here's what I've discovered about soil moisture: too wet and you risk rot, too dry and germination stalls. I've had the most success using a spray bottle to water lightly until the soil is moist but not waterlogged. The plastic dome or wrap creates a mini greenhouse effect, but remember to remove it for 10 minutes daily to prevent mold. This balance is what gets those seedlings through their first critical weeks.
Germination Watch: In Step 5, patience is your virtue. The 4-12 week range can feel like forever, but those white roots emerging first are your reward for all the prep work. I've found that keeping a journal helps—marking when you planted, when you first saw moisture absorption, and when you notice any root activity. This creates a pattern you can replicate with future seeds. And remember, those 2-3 inches of growth are your signal that the seedling is ready for its next adventure.
Pro Tips for How Do You Prepare A Cherry Seed For Planting
- These game-changing strategies will help you maximize germination success with minimal effort.
- Timing Secret: In Step 2, when you're soaking those seeds for 24-48 hours, resist the urge to rush—this is where the ...
- Cold Treatment Insight: During the 4-6 week stratification in Step 3, consistency is key. I've learned the hard way t...
Frequently asked questions
Got questions about growing cherries from seed? You’re not alone! Here are answers to the most common queries—so you can skip the guesswork and focus on sprouting success.
Do cherry seeds need stratification before planting?
Yes! Cherry seeds require stratification (a cold, moist treatment) to break dormancy. After softening, store them in a damp paper towel in the fridge for 6–12 weeks to mimic winter conditions. This step is critical—skipping it often means no sprouts!
How long does it take for a cherry seed to germinate?
Germination can take 3–12 weeks, depending on the variety and conditions. Patience is key! Keep the soil moist (not soggy) and warm (70–80°F) for best results. If nothing sprouts after 3 months, the seed may not have survived stratification.
Can I plant cherry seeds directly in the ground without softening?
Direct planting without softening is risky—most seeds won’t sprout. The hard pit resists water absorption, and the embryo inside lacks energy to break through. Always soften the seed first (or buy pre-stratified seeds) for reliable growth. Pro tip: Start indoors in pots for better control!
Will a cherry tree grown from seed taste like the parent fruit?
Probably not! Seed-grown cherries are unpredictable—they may produce small, tart fruit (or none at all) and won’t match the parent tree’s flavor or traits. For reliable results, graft a known variety onto a seedling rootstock. Patience pays off for fruit lovers!
What do I do if my cherry seed sprouts but grows slowly?
Slow growth is normal at first! Ensure your seedling gets bright, indirect light (no harsh sun) and consistent moisture. Overcrowding or weak soil can stunt progress. Thin seedlings if needed, and fertilize lightly with a balanced formula once true leaves appear.
Can I reuse leftover cherry pits for planting?
Yes, but act fast! Store unused pits in a dry, airtight container in the fridge for up to 1 year. After that, viability drops sharply. Label them with the date to track freshness—old seeds often fail to sprout.
Wrapping up and next steps
Preparing cherry seeds for planting is all about patience and the right technique—your future tree starts with these simple steps! By softening the hard seed coat through scarification or stratification, you unlock the potential for healthy sprouts.
Whether you’re a gardening novice or a seasoned green thumb, this method makes growing cherries from seeds surprisingly achievable.
Now that you’re ready, grab those seeds and give them the care they deserve. Next up? Plant them in well-draining soil, keep them moist, and watch your little cherry tree grow—one seed at a time! 🌱✨