
Lawn
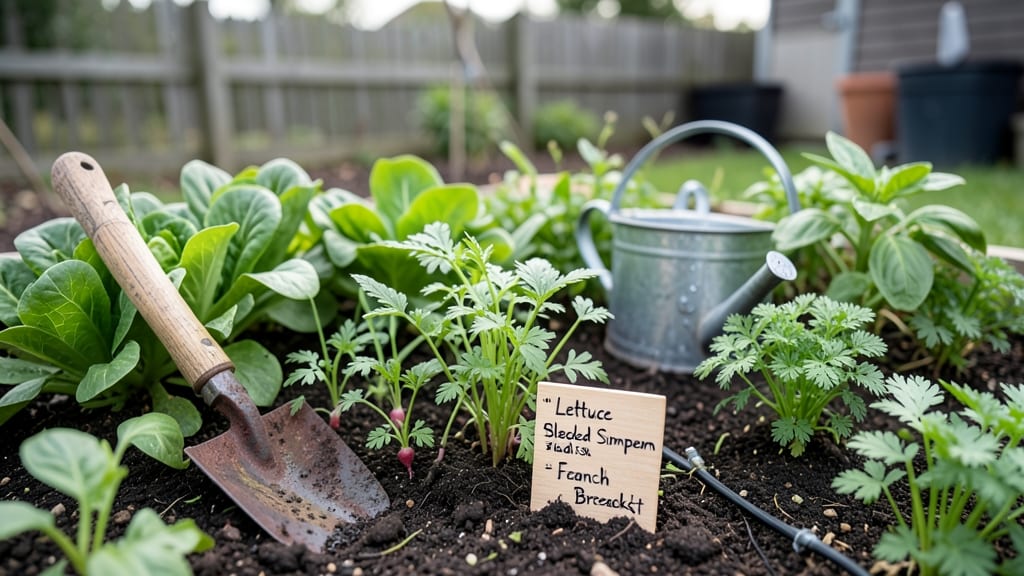
A green seed garden isn’t just a plot—it’s a living promise of year-round harvests and self-sufficiency. 🌱 I’ve designed mine to be both productive and beautiful, where every seed saved becomes next year’s bounty. The key? Smart layouts that maximize space while keeping nature’s cycles in harmony.
Start with open-pollinated seeds—heirlooms that thrive naturally without chemicals. Arrange your garden in sun-loving zones for easy care, and tuck seed-saving stations near your harvest areas. Companion plants like basil with tomatoes or marigolds with peppers work magic, deterring pests while boosting yields.
By summer’s end, you’ll have a thriving ecosystem where seeds multiply effortlessly. The best part? Your garden becomes a self-sustaining loop—planting, growing, and saving seeds year after year. Even small spaces can yield big results with the right design.
This approach works for balconies, backyards, or even windowsills. Whether you’re a beginner or seasoned gardener, the principles stay the same: grow what you love, save what you grow, and let nature do the rest.
📚 In This Guide
- What you need
- Instructions
- Tips and common mistakes
- Wrapping up and next steps
What you need
- ● Seeds: Choose heirloom, non-GMO, or organic seeds suited for year-round growth (e.g., lettuce, kale, spinach, radishes, microgreens, or herbs like basil and cilantro). Start with 5–10 seed packets (or bulk seeds for cost savings).
- ● Growing Medium: Potting Soil: 1–2 cubic yards of high-quality, organic potting mix (look for peat-free or coconut coir-based options for sustainability).
- ● Compost: 1–2 bags (5–10 gallons) to enrich soil with nutrients.
- ○ Optional: Hydroponic Clay Pebbles (for soilless setups) or vermiculite/perlite (for aeration).
- ● Containers: Grow Bags: 4–6 (5–10 gallon capacity, with drainage holes).
- ● Raised Beds: 1–2 (4’x8’ or smaller, with adjustable height).
- ○ Window Farms/Vertical Planters: Optional (for small spaces).
- ● Hand Trowel: 1 (for planting and soil prep).
- ● Pruners/Scissors: 1 pair (for harvesting and trimming).
- ● Spray Bottle: 1 (for seedling misting).
- ● pH Test Kit: 1 (to monitor soil acidity, ideal range: 6.0–7.0).
- ○ Grow Lights: Optional (LED full-spectrum bulbs for indoor/low-light setups).
- ○ Thermometer/Hygrometer: Optional (to track temperature and humidity).
- ● Sunlight Access: 4–6+ hours of direct sunlight daily (south-facing windows or outdoor space).
- ● Water Source: Hose or watering can with a gentle spray nozzle.
- ● Space: At least 2 sq. ft. per plant (or vertical space for compact setups).
- ● Patience & Planning: Research plant life cycles and succession planting to avoid overlap!
Step-by-step instructions for designing a year-round green seed garden
Here's how to create a thriving, low-maintenance seed garden that keeps producing all year.
🌱 Step 1: Plan Your Seasonal Succession Layout
Divide your space into four distinct zones based on harvest cycles. I start with cool-season crops—like spinach, kale, and peas—in early spring and fall, while warm-season staples such as tomatoes, peppers, and basil take center stage in summer. Use a simple sketch to map out where each plant will go, ensuring tall varieties like corn or sunflowers don't shade smaller seedlings.
For year-round production, stagger plantings so that as one crop finishes, another is ready to take its place. For example, plant lettuce in late summer for a fall harvest, then follow with radishes or carrots in early winter. This rotating schedule keeps your garden active and prevents soil depletion. Label each zone with the planting date and expected harvest time to track progress effortlessly.
🪴 Step 2: Prepare Raised Beds or Containers for Optimal Drainage
Construct or select raised beds at least 12 inches deep to accommodate root growth and improve drainage. Line the bottom with cardboard or landscape fabric to suppress weeds and prevent soil erosion. Fill the beds with a sterile seed-starting mix blended with compost for nutrients—this ensures roots grow freely without compacting.
For containers, choose 5-gallon buckets or fabric grow bags for individual plants like herbs or compact lettuce varieties. Drill multiple drainage holes in the bottom if using plastic pots, and elevate them on pot feet to prevent waterlogging. I always add a 1-inch layer of perlite or coarse sand at the bottom of containers to improve aeration and prevent root rot.
☀️ Step 3: Implement Layered Lighting for Extended Seasons
Install a full-spectrum LED grow light on a dimmable timer to supplement natural light during shorter winter days. Position the light 6-12 inches above seedlings, adjusting the height as plants grow. For cool-season crops, 12-14 hours of light daily is ideal, while warm-season plants thrive with 14-16 hours. Use a thermostat-controlled heat mat beneath seed trays to maintain 65-75°F soil temperatures for faster germination.
During summer, shade cloth (30-50% coverage) protects tender seedlings from intense afternoon sun. I rotate containers quarter-turn daily to ensure even light exposure and prevent leggy growth. Monitor leaf color—pale or yellowing indicates insufficient light, while crispy edges signal too much heat or dehydration.
💧 Step 4: Automate Watering for Consistent Moisture
Set up a drip irrigation system with micro-spray emitters to deliver water directly to the soil surface. Connect it to a smart timer to water early morning for 10-15 minutes daily, adjusting based on weather. Mulch beds with 2-3 inches of straw or shredded leaves to retain moisture and suppress weeds—this reduces evaporation and keeps roots cool.
For containers, use self-watering planters or wicking beds to maintain steady moisture. Check soil 1 inch below the surface—it should feel damp but not soggy. Overwatering in winter can lead to fungal diseases, while underwatering causes stress and stunted growth. A simple moisture meter helps track soil conditions without guesswork.
✂️ Step 5: Prune and Harvest Strategically for Continuous Yield
Train vining plants like cucumbers or beans to grow vertically using trellises or cages, freeing up ground space for additional crops. Prune yellow or damaged leaves immediately to redirect energy to healthy growth. For herbs like basil or cilantro, pinch back the tips to encourage bushier, more productive plants.
Harvest outer leaves from leafy greens like lettuce or spinach to promote regrowth. Pick tomatoes and peppers when fully colored but still firm to avoid overripening. I harvest early morning when flavors are most concentrated and moisture levels are highest. Leave 1-2 inches of stem when cutting to stimulate new growth.
Tips & tricks for perfect year-round seed garden success
Between us, these are the game-changers that'll transform your seasonal planning into an all-year harvest machine. The secret isn't just planting—it's the details that keep everything thriving when others give up.
Seasonal Transition Timing: The key to year-round success lies in those 2-3 week windows between seasons. Plant lettuce in late summer for fall harvests, then follow with radishes or carrots in early winter. I've found that planting kale in late August gives you crisp leaves through November, while overwintered spinach emerges in March. Track your first and last frost dates locally—these determine your planting windows more than any calendar does.
Lighting Layering Strategy: That 12-14 hour light window for cool-season crops isn't just arbitrary—it mimics natural winter daylight. Use a full-spectrum LED on a timer positioned 6-12 inches above seedlings, but here's what nobody tells you: adjust the height weekly as plants grow. I start with lights 8 inches high for seedlings, then raise to 12 inches by the 3-week mark. For warm-season plants needing 14-16 hours, supplement with an additional 2-hour morning session if natural light falls short.
Soil Temperature Secrets: While you're focusing on air temperature, soil temperature is what actually triggers germination. That 65-75°F range in Step 3 isn't just a suggestion—it's critical. Use a soil thermometer to verify before planting. I've seen seeds fail to germinate when soil was 60°F even though air temps were perfect. For cool-season starts, a heat mat set to maintain 70°F will give you a 2-week jump on spring planting. The difference between waiting for warm soil and forcing early starts can be weeks of harvest time.
Watering System Upgrade: The 10-15 minute daily watering isn't a one-size-fits-all. Install a rain gauge nearby and adjust your timer accordingly—1 inch of water per week is the general rule, but half that during cool seasons. I've added a secondary sensor to my drip system that triggers extra watering when soil moisture drops below 30%. The key is consistency: plants stressed by uneven moisture respond by bolting or flowering prematurely, especially greens like lettuce and spinach.
Pro Tips for Green Seed Garden
- Between us, these are the game-changers that'll transform your seasonal planning into an all-year harvest machine.
- Seasonal Transition Timing: The key to year-round success lies in those 2-3 week windows between seasons.
- Lighting Layering Strategy: That 12-14 hour light window for cool-season crops isn't just arbitrary—it mimics natural winter daylight.
Frequently asked questions
What’s the best time of year to start a green seed garden?
For most climates, sow seeds in early spring (after the last frost) or late summer (6-8 weeks before the first frost). Fast-growing greens like lettuce or radishes can even thrive in fall or winter with cold-hardy varieties. Check your USDA Plant Hardiness Zone for local timing!
How much does it cost to start a green seed garden?
Costs vary, but you can start small for under $20! Seeds (e.g., microgreens, sprouts) are cheap ($1–$5 per packet), while soil, trays, and grow lights add up to $50–$150 for a beginner setup. Reuse containers (like egg cartons) to cut costs even further. Pro tip: Buy in bulk or swap seeds with local gardeners!
Can I grow a green seed garden indoors without sunlight?
Use a grow light (LED or fluorescent) 12–16 hours/day, or place trays near a sunny window. Leafy greens like spinach or kale thrive indoors with minimal light. Just ensure good air circulation to prevent mold. Troubleshooting: If seedlings stretch (called "legginess"), they need more light!
What are the easiest greens for beginners to grow from seed?
Start with these low-maintenance picks:
- Microgreens (e.g., broccoli, radish)—ready in 7–14 days!
- Lettuce (butterhead or romaine)—fast and forgiving.
- Spinach—grows well in cool weather.
- Arugula—peppery flavor, thrives in partial shade.
Why are my seeds not sprouting? Troubleshooting tips!
Common culprits:
- Too dry/wet soil: Keep soil moist but not soggy—mist seeds lightly.
- Old seeds: Check the packet date; most last 1–2 years.
- Temperature issues: Most seeds need 65–75°F to germinate. Use a heat mat if needed.
- Buried too deep: Tiny seeds (like lettuce) need just ¼ inch of soil.
Wrapping up and next steps
Creating a green seed garden is your ticket to a thriving, year-round harvest—no more guesswork, just fresh, homegrown goodness! 🌱 By choosing the right seeds, optimizing your space, and mastering simple techniques, you’ve unlocked the secret to a bountiful garden that works with nature, not against it.
Ready to take the next step? Start small—plant a few easy-to-grow varieties this week—and watch your confidence (and harvests!) grow. Soon, you’ll be swapping store-bought produce for your own homegrown masterpieces—one seed at a time!