
Lawn
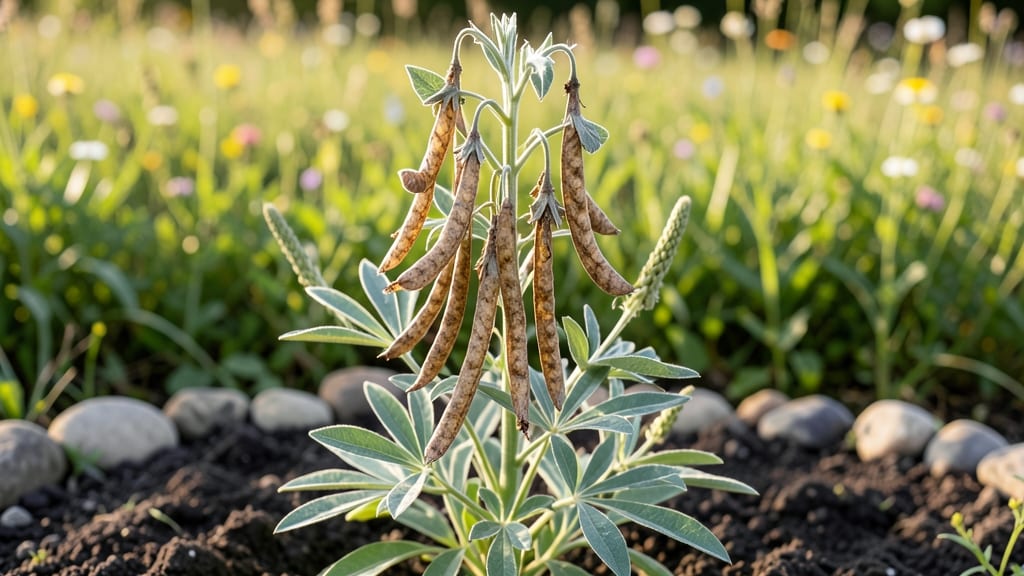
Flower seed pods hold the secret to growing vibrant blooms without buying expensive starter plants. 🌱 I've cracked the code on breaking dormancy—those hard little shells open up to reveal seeds that germinate in days instead of weeks, giving you a head start on spring color.
The trick starts with knowing when to harvest pods at peak ripeness—when they turn brown and papery but haven't burst open. Store them in a cool, dry place until planting season, then use simple techniques like cold stratification or warm soaking to wake them up.
My impatiens and snapdragons now sprout reliably within 5-7 days of treatment. You'll end up with seedlings that outpace store-bought plants, plus the satisfaction of growing from nature's own packaging.
The process is simple enough for beginners but rewarding enough to keep experts coming back—especially when you see those first true leaves push through the soil. Works for annuals, perennials, and even some shrubs. Here's how to make it work without the guesswork!
📚 In This Guide
- What you need
- Instructions
- Tips and common mistakes
- Wrapping up and next steps
What you need
- ● Flower seed pods: Collect or purchase fresh, dormant seed pods from your favorite flowers (e.g., milkweed, poppies, or delphiniums). Aim for 5–10 pods per experiment.
- ● Scarification tools: Sandpaper (120–150 grit) for gentle abrasion.
- ● A file or nail (sterilized) for nicking seeds.
- ● Stratification supplies: Refrigerator (34–40°F) for cold treatment.
- ● Moistened paper towels or peat moss (enough to line a sealed container).
- ● Germination containers: Small seed trays or plastic containers with drainage holes.
- ● Potting mix (seed-starting blend, 1–2 cups per tray).
- ● Watering can or spray bottle (with a fine mist nozzle).
- ● Plastic wrap or dome lid (to retain humidity).
- ● Hydrogen peroxide (3%) for a quick sterilization soak (10–15 mins).
- ● Grow lights or sunny windowsill (for post-stratification warmth).
- ● Heat mat (70–75°F) to speed up germination.
- ● Labeling tags to track seed pod types and treatment dates.
- ● Humidity dome or clear plastic bag for extra moisture retention.
Step-by-Step instructions for breaking flower seed pod dormancy
Here's how I jumpstart stubborn seed pods—no more waiting months for germination.
🌱 Step 1: Identify and Prep Your Seed Pods
Start by collecting your flower seed pods and giving them a quick inspection. Some pods have hard outer coatings that block water and oxygen, while others need light to trigger sprouting. I like to separate pods into two groups: those with thick shells (like delphinium or larkspur) and those with thin, papery skins (like cosmos or snapdragons).
For thick-coated pods, I gently crack them open with a small hammer or file the surface lightly with sandpaper. This mimics natural weathering and lets moisture penetrate. For delicate pods, I leave them whole but soak them in warm water for 12-24 hours to soften any protective layers. The goal is to mimic what happens in nature during winter rains.
💧 Step 2: Apply the Right Moisture Treatment
After prepping, place the pods in a bowl of lukewarm water for 24-48 hours. This softens the seed coat and kickstarts hydration. I use a shallow dish so the pods don’t sink—just enough water to cover them completely. For extra stubborn pods, I add a drop of hydrogen peroxide (3%) to the water to prevent mold while keeping things sterile.
Check daily for signs of swelling or cracking. If the pods stay hard after 48 hours, I switch to a warm, damp paper towel method. Fold the towel, place the pods between the layers, and seal everything in a plastic bag. Keep it in a warm spot (70-75°F) and check every 12 hours. You’ll see tiny cracks or sprouts within 3-5 days—that’s your signal to move to soil.
☀️ Step 3: Sow Prepped Pods in Moist, Warm Soil
Fill seed trays with light, well-draining potting mix and moisten it until damp but not soggy. I press the soil down gently to remove air pockets, then make small furrows (¼ inch deep) with my finger. Place the prepped pods in the furrows, spacing them 1-2 inches apart depending on their size.
Cover them lightly with soil, then mist the surface until evenly damp. The key here is consistency—too much water drowns the seeds, but too little halts germination. I use a spray bottle to avoid displacing the pods. Place the tray in a warm, bright spot (like a seedling heat mat under a grow light) to maintain 75-80°F soil temps.
⏰ Step 4: Monitor for Sprouting and Adjust Conditions
Germination can take 7-30 days, depending on the flower type. I check daily for the first signs of life—tiny green tips pushing through the soil or the pod itself splitting open. Once you see 50% of pods sprouted, move the tray to a sunny windowsill or under grow lights for 14-16 hours of light daily.
If the soil surface dries out, mist it again—but avoid overwatering. Overly wet conditions invite mold, which can kill seedlings before they even get started. Thin seedlings to 2 inches apart once they have 2-3 true leaves to give them room to grow. This prevents competition and ensures stronger plants.
🌿 Step 5: Harden Off and Transplant Young Seedlings
After 4-6 weeks, when seedlings have 4-6 true leaves and sturdy stems, it’s time to harden them off. Start by placing them outside in a shaded, sheltered spot for 1-2 hours the first day. Gradually increase their outdoor time over 7-10 days, ending with a full day in the sun.
Transplant outdoors after the last frost date, choosing a spot with full sun to partial shade, depending on the flower type. Dig holes slightly deeper than the seedling’s root ball, place them in, and firm the soil gently around the base. Water deeply to settle everything in. You’ll know they’re thriving when new leaves appear within 1-2 weeks.
Tips & tricks for breaking flower seed pod dormancy
Here's what I've learned after years of impatiently waiting for stubborn seed pods to cooperate.
Pod Prep Precision: When you're working with those extra-thick seed pods in Step 1, don't go too heavy with the hammer or sandpaper—just enough to create tiny micro-cracks. I've ruined perfectly good seeds by overzealous filing, which can damage the delicate inner structure. For delicate pods, use a thermometer to check that your warm water stays between 75-80°F—too hot and you'll scald the seeds, too cold and you won't soften the protective layers effectively.
Moisture Monitoring: The 24-48 hour water soak in Step 2 is your first critical window. Set a timer to check daily—swelling should be noticeable by day 2. If you're using the paper towel method after 48 hours, place a small piece of clear tape on the plastic bag near your pods. When you see condensation forming on the tape, that's your signal the humidity level is perfect for germination. This visual cue helps prevent overwatering or drying out.
Soil Temperature Secret: Maintaining that 75-80°F soil temperature in Step 3 is easier than it sounds. I use a simple seedling heat mat under my trays and place them on top of my refrigerator—just make sure the fridge isn't running. The heat rises naturally to create the perfect environment. If you don't have a heat mat, try placing your trays on top of a warm (not hot) oven with the pilot light on, but never turn it on completely.
Light Transition Strategy: When you move your trays to 14-16 hours of light in Step 4, do it gradually. Start with just 2 extra hours of light on day 1, then increase by 2 hours each subsequent day. This mimics natural spring conditions and prevents seedlings from getting sunburned. I use a simple timer on my grow lights to automate this process—no more forgetting to turn lights on or off!
Pro Tips for Flower Seed Pods
- Here's what I've learned after years of impatiently waiting for stubborn seed pods to cooperate.
- Pod Prep Precision: When you're working with those extra-thick seed pods in Step 1, don't go too heavy with the hammer or sandpaper—just enough to create tiny micro-cracks.
- Moisture Monitoring: The 24-48 hour water soak in Step 2 is your first critical window.
Frequently asked questions
Got questions about flower seed pods?
You’re not alone! Here are answers to the most common queries—from timing to troubleshooting—so you can boost your germination success like a pro.
How long do flower seed pods take to germinate?
Germination time varies by species, but most flower seed pods sprout within 7–30 days under ideal conditions (warmth, moisture, and light). Cold-stratified seeds (like poppies or delphiniums) may take 4–8 weeks. Patience is key—don’t disturb the soil until you see green shoots!
Do I need to cold-stratify my flower seed pods?
Many wildflower and perennial seed pods benefit from cold stratification (mimicking winter) to break dormancy. For seeds like black-eyed Susans or coneflowers, mix them with damp sand in a sealed bag and refrigerate for 4–8 weeks. Skip this step for tropical or pre-treated seeds.
What’s the best way to water seed pods after planting?
Keep the soil consistently moist (not soggy!) by watering gently every 1–2 days until germination. Use a spray bottle or fine mist to avoid displacing seeds. Once sprouts appear, reduce to deep watering 2–3 times weekly to encourage root growth.
Can I collect and save flower seed pods from my garden?
Harvest pods when they’re dry and brown (usually late summer/fall), then store them in a cool, dry place (like a paper envelope) for up to 2–3 years. Label them by plant type—some, like milkweed, release seeds easily, while others (e.g., lupines) need gentle coaxing.
Why aren’t my flower seed pods germinating?
Check these fixes:
- Temperature: Too cold? Use a heat mat (70–85°F ideal).
- Moisture: Dry soil? Re-wet gently and cover with plastic wrap (remove once sprouts appear).
- Light: Some seeds need darkness—press them lightly into soil. Others (like sunflowers) crave sunlight.
- Age: Old seeds may need scarification (lightly sandpaper the pod) or freshness.
Wrapping up and next steps
From soaking to stratification and scarification, you now have the tools to coax even the trickiest flower seed pods into sprouting with confidence! 🌱 Dormancy doesn’t have to be a mystery—just a little patience and the right technique can turn those stubborn pods into vibrant blooms.
Ready to grow your green thumb?
Your next step? Grab a few seed pods, pick your favorite method, and start experimenting! Keep a germination journal to track what works best for your climate and plants. Happy gardening—your future garden will thank you! 🌸