
Pruning
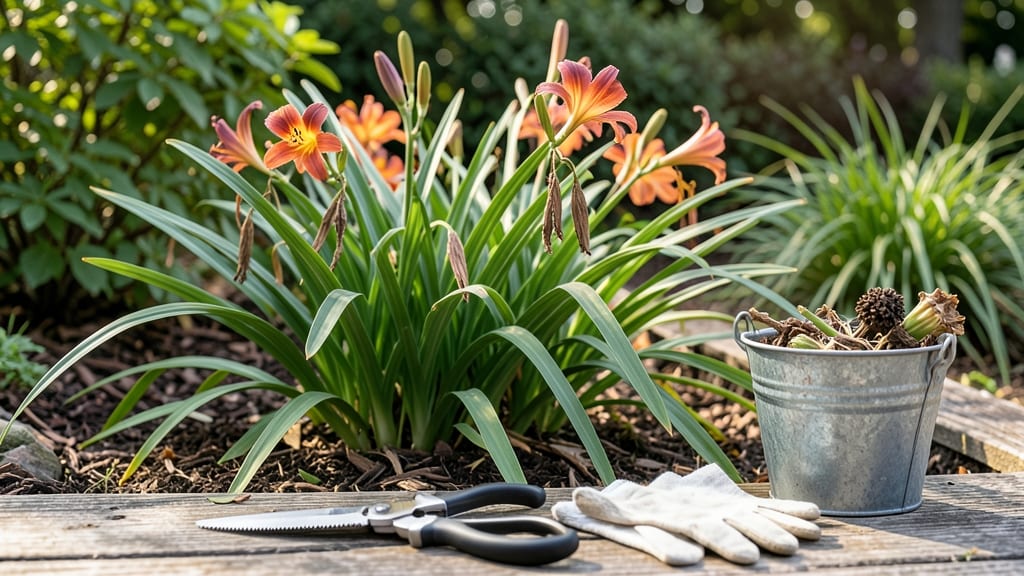
Your daylilies could be blooming nonstop this season—if you deadhead them right. ✂️ I’ve spent years watching daylilies go from vibrant summer stars to sad, seed-pod-laden shadows, and the fix is simpler than you’d think.
The key? Timing, technique, and knowing when to let those seed pods stay (or send them packing).
You’ll need sharp pruners, a sunny afternoon, and about 15 minutes per plant—no fancy tools, just clean cuts. The real magic happens when you snip just above the next set of leaves, not at the base.
This trick tells the plant, "Hey, keep growing!" and triggers a second wave of blooms before frost. Seed pods? Remove them if you want more flowers, but leave a few if you’re saving seeds for next year.
After deadheading, give your daylilies a light drink of water and watch them bounce back. Within 2-3 weeks, you’ll see fresh buds forming, and your garden will stay lively long after other perennials have called it quits.
The best part? This method works for every variety, from classic ‘Stella de Oro’ to heirloom giants.
Pro tip: Mark your calendar for late summer (after the first big bloom rush but before hard frost). Over-prune in fall, and you’ll stunt next year’s growth. Trust the process—your daylilies will thank you with months of extra color.
📚 In This Guide
- What you need
- Instructions
- Tips and common mistakes
- Wrapping up and next steps
What you need
- ● Pruning shears or bypass pruners: A sharp pair (4–6" blades) for clean cuts. Pro tip: Sterilize with rubbing alcohol to prevent disease spread!
- ● Garden gloves: A pair of durable, cut-resistant gloves (e.g., mechanized or leather) to protect hands from thorns and dirt.
- ○ Trimming scissors (optional): For delicate stems or tight spaces (3–4" blades).
- ● Garden twine or a bucket: To collect spent blooms and seed pods (1–2 gallons capacity).
- ○ Disposable pruning bags (optional): For quick cleanup of debris (5–10 gallon size).
- ● Garden hose or spray bottle: To rinse tools between cuts and keep work area tidy.
- ● Dry, sunny day: Avoid pruning after rain or when plants are wet to reduce fungal risks.
- ● Late afternoon timing: Deadhead after 4 PM to minimize stress on plants.
- ● Clear workspace: Remove weeds, rocks, or debris around daylilies for easy access.
- ● Compost bin or green waste bin: For disposing of healthy plant matter (if not composting on-site).
Step-by-Step guide to deadheading daylilies for continuous blooms
Here's how I keep my daylilies flowering all season—no more spent blooms stealing energy from next year's flowers.
✂️ Step 1: Identify and Remove Spent Blooms
Start by scanning each stem for blooms that have fully opened and begun to fade. Look for petals that have curled or fallen away, leaving behind the brown seed pod at the center. These are your targets—they're finished producing flowers and now drain energy from the plant.
Grasp the stem just below the faded bloom with your thumb and forefinger, about 1-2 inches below the seed pod. This is where new side buds often form, so cutting too high removes potential future flowers. Use clean, sharp pruners to make a clean cut at a slight angle—never tear the stem, which can damage the plant.
🌱 Step 2: Handle Seed Pods Strategically
Daylily seed pods form after blooms fade, and while they're harmless, they consume energy the plant could use for next year's blooms. If you want to encourage more flowers, pinch off seed pods as soon as they appear. This redirects the plant's energy toward producing new stems and buds.
For gardeners who enjoy collecting seeds, leave a few pods on the healthiest stems. However, limit these to no more than 10-15% of your plants—any more and you'll notice fewer blooms next season. Use your fingers to gently twist off the pods rather than cutting, which prevents accidental damage to the stem.
☀️ Step 3: Prune for Airflow and Light Penetration
After removing spent blooms and seed pods, step back and assess the plant's overall shape. Daylilies grow best when they receive good airflow and sunlight. Look for crowded stems or leaves that block light from reaching the center of the plant—these are prime candidates for thinning.
Use your pruners to trim back any overly dense foliage, cutting at the base of the plant. Aim to create an open, airy structure that allows sunlight to reach all parts of the plant. This not only encourages more blooms but also reduces the risk of fungal diseases like leaf spot, which thrive in damp, shaded conditions.
💧 Step 4: Fertilize and Water for Recovery
Deadheading is stressful for the plant, even though it's beneficial in the long run. After pruning, give your daylilies a boost by applying a balanced, water-soluble fertilizer at half strength. This provides the nutrients needed to support new growth without overwhelming the plant.
Water the plants deeply after fertilizing to help them absorb the nutrients and recover from the pruning. Aim to keep the soil consistently moist but not soggy—daylilies are drought-tolerant once established, but they'll reward you with more blooms if you maintain even moisture during the late-summer growing period.
⏰ Step 5: Monitor and Repeat Weekly
Daylilies are prolific bloomers, and new flowers will continue to open throughout the summer. To maintain continuous blooms, make deadheading a regular part of your gardening routine. Check your plants every 5-7 days and remove any spent blooms or seed pods as they appear.
This ongoing maintenance ensures that your daylilies remain vigorous and productive. You'll see a noticeable difference in the number of blooms and the overall health of your plants by late summer. Plus, the process becomes quicker as you get into the rhythm—it's like a little gardening meditation!
Tips & tricks for perfect daylily pruning
These simple tricks will help you maximize blooms and keep your daylilies thriving all season long.
The Right Cutting Angle: When pruning spent blooms in Step 1, make sure to cut at a slight angle just below the seed pod. This prevents water from pooling on the cut surface, which could lead to rot. I always visualize a small "V" shape—this not only looks cleaner but also helps with water runoff. The 1-2 inch guideline is perfect for preserving those potential side buds that might develop into new flowers.
Seed Pod Strategy: In Step 2, remember that seed pods are energy vampires for your plants. For maximum blooms, remove them as soon as they appear. If you're saving seeds, limit pods to just 10-15% of your healthiest plants—any more and you'll notice fewer flowers next season. I've found that twisting pods off with fingers works better than cutting, which can accidentally damage the stem and invite pests.
Timing is Everything: The 5-7 day monitoring schedule in Step 5 is crucial during peak bloom season. Early morning is the best time to deadhead—cooler temps reduce stress on the plant, and you'll catch spent blooms before they've had a chance to form seed pods. I set a reminder on my phone for every Thursday morning to keep this routine consistent.
Fertilizer Timing: After pruning in Step 4, apply that half-strength fertilizer right after watering. This helps the plant absorb nutrients immediately. I've noticed that daylilies respond best when fertilized in the late afternoon, giving them time to process nutrients before evening. Avoid fertilizing right before a heavy rain—it can wash away before the plant can use it.
Pro Tips for Deadheading Daylilies And Seed Pods
- These simple tricks will help you maximize blooms and keep your daylilies thriving all season long.
- The Right Cutting Angle: When pruning spent blooms in Step 1, make sure to cut at a slight angle just below the seed ...
- Seed Pod Strategy: In Step 2, remember that seed pods are energy vampires for your plants. For maximum blooms, remove...
Frequently asked questions
Got questions about deadheading daylilies and seed pods? You’re not alone! Here are some of the most common queries—and their straightforward answers—to keep your garden thriving.
When is the best time to deadhead daylilies?
Deadhead spent blooms as soon as they fade (or turn brown) to redirect energy to new flowers. For seed pods, remove them after they’ve dried on the stalk—usually in late summer or early fall. Pro tip: Regular deadheading can extend blooms into early frost!
How often should I deadhead daylilies?
Check your plants weekly during peak bloom (late spring to summer). Daylilies are forgiving, so don’t stress over missed blooms—just focus on removing faded flowers before they form seed pods. Overzealous pruning? No worries—they bounce back!
Can I skip deadheading and still get blooms?
Yes! Daylilies are resilient, but skipping deadheading means fewer flowers and more seed pods. If you’re low-maintenance, let a few pods form for next year’s seeds—but expect shorter bloom seasons. Hot climates may benefit more from deadheading to avoid stress.
What if I accidentally cut into the daylily stalk?
Don’t panic! Daylilies heal quickly. If you nick the stem, trim it back to a healthy node (a small bump where leaves grow). Avoid cutting into the crown (the base where roots meet stems)—this can harm the plant. Use sharp shears for clean cuts!
Should I remove ALL seed pods, or leave some for propagation?
Leave 1-2 pods per stalk if you want seeds for dividing or sharing. Remove the rest to encourage more blooms. Harvest seeds when pods turn brown and papery—then dry them indoors before storing. Save extra seeds for spring planting!
Wrapping up and next steps
Deadheading daylilies and removing seed pods is your secret weapon for prolonged blooms and a tidier garden! By dedicating just a little time to this late-summer task, you’ll encourage your plants to focus their energy on next season’s growth—not wasted seeds. 🌸
Ready to take the next step? Grab your pruners and schedule a quick session every 1-2 weeks during peak bloom. Your daylilies will thank you with vibrant, continuous flowers all season long!