
Lawn
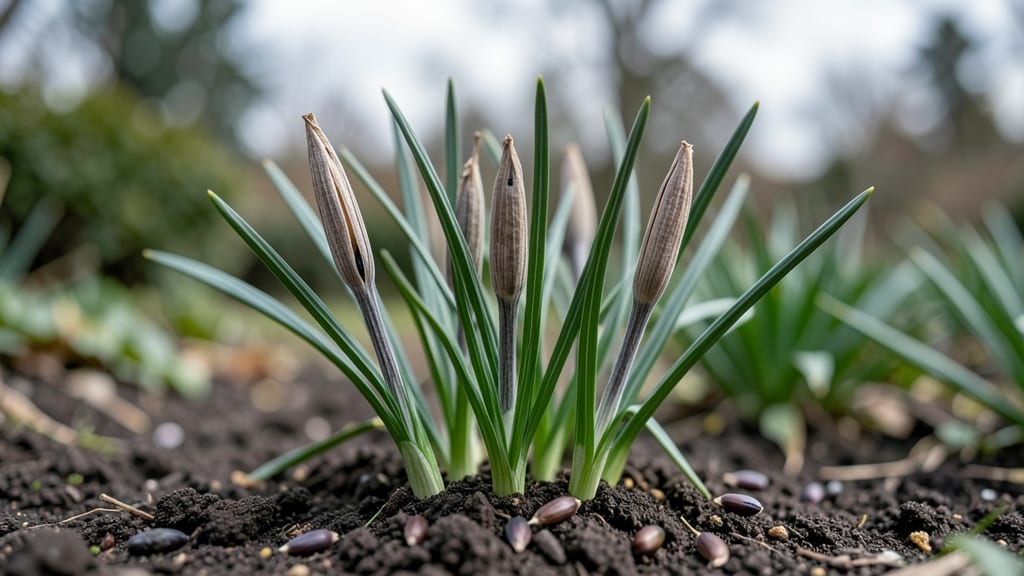
Harvesting crocus seed pods transforms last year's blooms into next season's garden stars—without the fuss of twisted stems or broken pods. 🌱 I've collected hundreds of these delicate pods over the years, and the secret to success lies in timing, gentle handling, and knowing exactly when to pluck them from the fading foliage.
The right moment arrives when the pods turn from green to a papery brown, usually 4-6 weeks after blooming. Grab a small mesh bag or envelope to collect them—never let them dry on the plant, or they'll scatter seeds everywhere.
A single pod can yield dozens of tiny, dust-like seeds, so patience pays off when you're growing rare varieties.
Once dried indoors for 1-2 weeks, store the seeds in a cool, dark place until spring planting. Germination takes time—sometimes up to 6 months—but the payoff is worth it: homegrown crocuses that thrive for decades.
This method works best for heirloom or unusual types where corms are hard to find.
For beginners, seed propagation might feel slow compared to planting corms, but the satisfaction of watching your own crocuses emerge year after year makes it all worthwhile. Here's how to do it right the first time.
📚 In This Guide
- What you need
- Instructions
- Tips and common mistakes
- Wrapping up and next steps
What you need
- ● Mature crocus plants – Choose healthy, fully bloomed plants with seed pods (typically late spring/early summer).
- ● Pruning shears or sharp scissors – For clean cuts without damaging stems.
- ○ Paper bags or breathable mesh sacks – 5-10 bags (1 per pod or cluster). Optional: Label with plant names if cross-pollination is a concern.
- ○ Gloves (optional but recommended) – Protects hands from thorns or rough stems.
- ● Notebook & pen – To track varieties and harvest dates.
- ● Twine or rubber bands – For securing seed pods to bags.
- ● Drying rack or paper towels – For indoor drying (e.g., a wire cooling rack or flat surface).
- ○ Small fan (optional) – Speeds up drying in humid climates.
- ● Wait until seed pods turn brown and dry (usually 6–8 weeks after blooming). 💡 Pro tip: Gently squeeze—if seeds rattle inside, they’re ready!
- ● Harvest on a dry, sunny day to minimize mold risk.
- ● Ensure pods are fully mature—green or soft pods won’t yield viable seeds.
How to harvest crocus seed pods without damaging future blooms
Here’s my foolproof method for collecting seed pods while ensuring your crocus plants thrive for years to come.
🌱 Step 1: Identify Mature Seed Pods at the Right Time
Wait until the seed pods turn a deep brown color and split open naturally—this usually happens 4-6 weeks after flowering. If you harvest too early, the seeds won’t be fully developed. I check pods daily during this window because they dry out quickly in hot weather.
Gently squeeze a pod between your fingers—if it crumbles easily, it’s ready. Avoid harvesting if the pod is still green or firm, as the seeds inside won’t be viable. This is the moment that matters: patience here means stronger blooms next spring.
✂️ Step 2: Snip Pods Cleanly Without Twisting
Use clean sharp scissors or pruning shears to cut the entire pod off at its base, leaving about ½ inch of stem. Twisting or pulling pods risks damaging the plant’s energy reserves, which are crucial for next year’s growth. I always sterilize my tools with rubbing alcohol first to prevent fungal spread.
Place the pods in a paper bag (not plastic) to allow airflow while they finish drying. If you skip this step, moisture trapped inside can cause mold before you even get to the seeds. Real talk: I’ve lost entire batches of seeds this way—don’t make my mistake.
🪴 Step 3: Dry and Store Pods Properly for Viable Seeds
Let the pods dry in a cool, dry place (around 60-70°F) for 2-3 weeks. I hang them upside down in a mesh bag to prevent pests from nesting inside. Once completely dry, they’ll rattle when shaken—this is your signal that the seeds are ready for extraction.
Store the dried pods in an airtight container with a silica gel packet to absorb excess moisture. Label the container with the date and variety if you’re growing multiple types. Seeds remain viable for 1-2 years under these conditions, so proper storage makes all the difference.
🌿 Step 4: Extract and Plant Seeds for Next Season’s Blooms
Open the dried pods and gently separate the seeds from the chaff. Crocus seeds are tiny—think pinhead-sized—so I use tweezers to handle them carefully. Plant them ¼ inch deep in well-draining soil, spaced 1 inch apart, in early fall for spring germination.
Keep the soil lightly moist but never soggy until germination occurs, which can take 4-6 weeks. Young seedlings are delicate, so avoid disturbing them. Here’s the thing—crocus seeds take 2-3 years to bloom from seed, but the wait is worth it for naturalized gardens where they multiply effortlessly.
⏰ Step 5: Monitor Parent Plants for Next Year’s Growth
After harvesting, water the parent plants deeply to replenish moisture lost during pod removal. Crocus bulbs are hardy but benefit from a light layer of mulch (about 1 inch) to protect them over winter. I mark harvested areas with small stakes so I don’t accidentally dig them up later.
By next spring, you’ll see new shoots emerging—proof that your harvesting didn’t weaken the plants. This is the reward: a cycle of self-sustaining blooms with minimal effort. I’ve done this for years, and every time, the garden rewards my patience with vibrant purple, white, or striped flowers.
Tips & tricks for perfect crocus seed pod harvesting
These small details make all the difference when preserving your garden's future blooms.
Timing is Everything: The 4-6 week window after flowering is critical—this is when pods mature fully. I've learned the hard way that harvesting too early means underdeveloped seeds, while waiting too long risks them drying out completely on the plant. Check pods daily during this window, especially in hot weather where drying happens faster. Confession: I skipped this once and ended up with mostly empty pods!
Tool Prep Prevents Problems: Sterilizing your scissors or pruning shears with rubbing alcohol before cutting is a game-changer. I've seen fungal infections spread through unsterilized tools, ruining entire batches. Also, make sure your tools are sharp—dull blades crush pods and damage stems. The clean cut at the base with that ½-inch stem left behind ensures the plant's energy reserves stay intact for next year's growth.
Drying Strategy: That 2-3 week drying period at 60-70°F isn't just arbitrary—it's when the seeds fully mature and become viable. I hang mine upside down in mesh bags because this prevents two major issues: pests getting trapped inside and moisture buildup that could cause mold. The rattling test is foolproof—when pods rattle, you know the seeds are ready for extraction. Don't rush this step!
Plant Care After Harvest: The 1-inch mulch layer and deep watering after harvesting might seem like small details, but they're what ensures your parent plants thrive. I've seen gardens where harvesters neglected this step, and the plants struggled to produce flowers the following spring. Marking harvested areas with stakes prevents accidental disturbance, which is especially important if you have children or pets wandering through the garden.
Pro Tips for Crocus Seed Pods
- These small details make all the difference when preserving your garden's future blooms.
- Timing is Everything: The 4-6 week window after flowering is critical—this is when pods mature fully. I've learned th...
- Tool Prep Prevents Problems: Sterilizing your scissors or pruning shears with rubbing alcohol before cutting is a gam...
Frequently asked questions
Got questions about harvesting and saving crocus seed pods? You’re not alone! Here are answers to the most common queries—so you can master the process and enjoy next year’s blooms with ease.
When is the best time to harvest crocus seed pods?
Harvest seed pods when they turn light brown and start splitting open—usually 6–8 weeks after blooming (late spring to early summer). Wait too long, and seeds may scatter or dry out. Morning harvests work best when pods are dry but still intact!
Do I need to twist off the seed pods, or can I cut them?
Twisting is ideal—gently twist the pod from the stem to avoid damaging the bulb. If pods are stubborn, use clean scissors or pruners (sterilized with rubbing alcohol) to snip just above the pod. Never pull—this can uproot the bulb!
How do I store crocus seeds until planting?
Store seeds in a paper envelope or mesh bag (not plastic!) in a cool, dry place (like a fridge or basement) for 4–6 weeks to stratify. Label the bag with the variety and harvest date. Avoid humidity—moisture causes mold!
What if my seed pods don’t open or produce seeds?
No seeds? Try these fixes:
- Pollination issue: Hand-pollinate by transferring pollen with a soft brush between flowers.
- Old bulbs: Crocus bulbs weaken after 3–5 years—replace them!
- Poor growing conditions: Ensure full sun and well-draining soil.
Can I grow crocus from store-bought bulbs instead of seeds?
If seeds seem tricky, opt for pre-packaged crocus bulbs for guaranteed blooms. They’re easier and faster—just plant in fall, 4–6 inches deep, and enjoy flowers in 3–5 months. Seeds take 2–3 years to mature!
Wrapping up and next steps
Harvesting crocus seed pods is a simple yet rewarding way to ensure vibrant blooms for seasons to come—no twisting required! 🌱 By following the right steps, you’ll preserve viability while keeping your garden thriving. Whether you’re a seasoned gardener or just starting out, this method makes propagation effortless and fun.
Ready to grow your own? Grab those pods, plant them in well-draining soil, and watch your garden flourish next spring. Happy gardening! 🌸