
Propagation
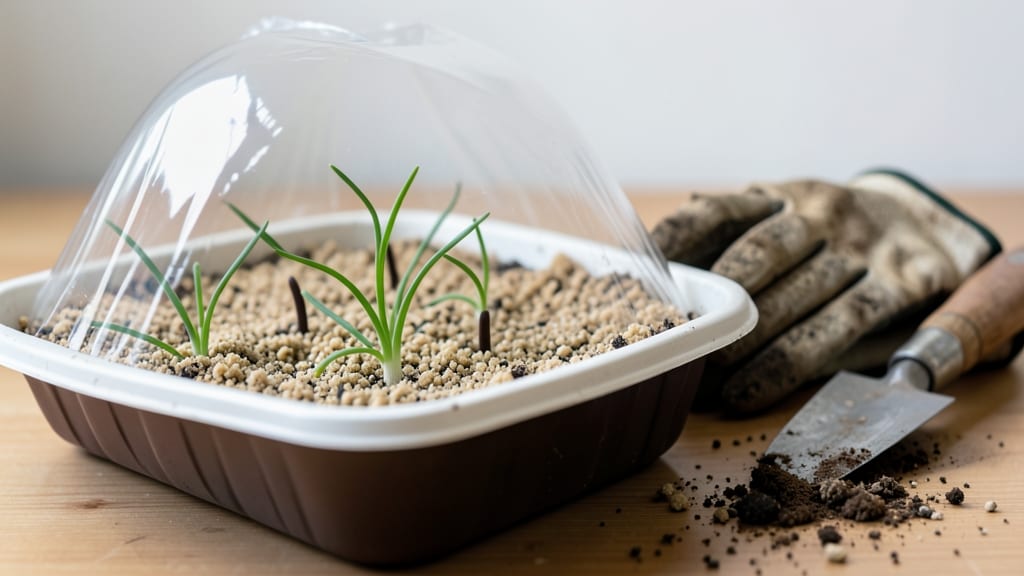
Cold-stratifying chive seeds cuts germination time from months to 3 weeks—no more waiting around for nature to do its thing. 🌱 I learned the hard way that chives won’t sprout reliably unless you mimic their natural winter-to-spring cycle, and this method guarantees those first green shoots within weeks, not months.
The secret lies in three simple steps: moistening the seeds, chilling them for 2-4 weeks, then planting them in well-draining soil. You’ll need a shallow container, damp paper towels, and a fridge for the cold treatment—no fancy equipment, just patience.
Most beginners overwater at this stage, but chives hate soggy soil.
By week 3, you’ll see delicate, grass-like sprouts pushing through the soil, ready to transplant. These seedlings grow fast once established, and you’ll harvest fresh chives in just 6-8 weeks—perfect for seasoning soups or garnishing meals.
The key is consistency: keep soil moist but not waterlogged, and avoid moving the container during germination.
Works equally well indoors near a sunny window or outdoors after last frost. If you’ve struggled with chive seeds before, this method finally delivers reliable results—no more empty seed packets gathering dust in the pantry.
📚 In This Guide
- What you need
- Instructions
- Tips and common mistakes
- Wrapping up and next steps
What you need
- ● Chive seeds: 1 packet (1,000–2,000 seeds, organic preferred for best results). Pro tip: 💡 Choose open-pollinated varieties for heirloom quality!
- ● Seed-starting mix: 1–2 lbs of sterile, peat-free potting soil (or a 50/50 blend of coco coir + perlite for drainage). Avoid garden soil—it’s too dense!
- ● Containers: Primary: 4–6 3–4" biodegradable pots (or a shallow tray with drainage holes) for stratification.
- ○ Secondary (optional): 1–2 6-pack cell trays for transplanting after germination.
- ● Spray bottle: 8–16 oz with a fine mist nozzle (for gentle hydration).
- ● Plastic wrap or humidity dome: Clear plastic wrap or a seedling heat mat cover to retain moisture during stratification.
- ○ Refrigerator or cold frame: A standard fridge (34–40°F) or a seedling cold mat (optional but speeds up stratification).
- ● Grow lights or sunny windowsill: A LED grow light (12–16 hrs/day) or a south-facing window (6+ hrs of light) post-germination.
- ● Small hand trowel or spoon: For gentle soil handling.
- ● Heating mat: A seedling heat mat (70–75°F) to jumpstart germination after cold treatment.
- ● pH test kit: To check soil pH (ideal: 6.0–7.0 for chives).
- ● Fertilizer: 1 tsp fish emulsion (1-1-1) or seaweed extract for post-germination boost.
- ● Label markers: To track planting dates (chives can be tricky to ID as seedlings!).
Step-by-step instructions for cold-stratifying chive seeds
Here's the foolproof method I use to break chive dormancy and get sprouts in 3 weeks—no mystery involved.
🌱 Step 1: Prepare the Seeds for Stratification
Chive seeds need cold treatment to break dormancy, but first, you'll want to soften their tough outer shells. Soak the seeds in lukewarm water for 12-24 hours—this softens the seed coat and speeds up germination. I use a small bowl and cover it loosely with plastic wrap to keep moisture in while allowing airflow. After soaking, drain the water and let the seeds air-dry on a paper towel for 30 minutes to prevent mold.
While they dry, fill a sealed plastic bag (like a quart-sized zip-top) with dampened peat moss or coconut coir—it should feel like a wrung-out sponge, not dripping. The moisture level is critical here: too dry and germination stalls; too wet and seeds rot. Sprinkle the soaked chive seeds evenly over the damp medium, then seal the bag tightly. This creates the perfect humid, cold environment.
❄️ Step 2: Cold-Stratify for 2 Weeks
Place the sealed bag in your refrigerator (not the freezer) where temperatures stay between 34-40°F. I store mine on the middle shelf, away from the door where temps fluctuate. Check the bag after 7 days—if the medium feels dry, lightly mist it with water and reseal. You won't see sprouts yet, but the seeds are now actively breaking dormancy.
This 2-week cold period mimics winter conditions and tricks the seeds into thinking spring has arrived. Real talk: Skipping stratification means waiting 6-8 weeks for germination, if it happens at all. Patience here pays off—your future chive plants will thank you with stronger roots and faster growth.
🌿 Step 3: Transfer to Germination Trays
After 14 days, remove the bag from the fridge and open it in a well-ventilated area. The seeds should look slightly plump and ready to sprout. Fill 4-inch seed trays with sterile seed-starting mix (not garden soil) and moisten it until damp but not soggy. Press the mix down gently to create a firm, even surface—this helps seedlings establish quickly.
Sow the seeds ¼ inch deep, spacing them ½ inch apart in rows. I use a toothpick to make small divots for precision planting. Cover the seeds lightly with additional mix, then mist the surface with water until evenly moist. Place the tray in a warm spot (65-70°F)—a seedling heat mat works wonders here, but a sunny windowsill will do in a pinch.
☀️ Step 4: Provide Warmth and Light for Sprouting
Keep the soil consistently moist but never waterlogged—you'll know it's right when the surface looks slightly damp but doesn't glisten. Germination typically starts in 7-10 days, but some seeds may take up to 2 weeks to sprout. Once you see the first green shoots, move the tray to a bright location with 12-14 hours of indirect light daily. A grow light helps if natural light is weak.
Here's the thing—chive seedlings are delicate. Avoid disturbing them once they sprout, and resist the urge to water from above (top watering can dislodge tiny seedlings). Instead, use a watering can with a fine rose or a spray bottle to keep the soil evenly moist without disturbing the seeds.
🪴 Step 5: Thin and Transplant Young Seedlings
When seedlings reach 2 inches tall (about 4-6 weeks from sowing), it's time to thin them. Use a small pair of scissors to snip the weakest seedlings at soil level, leaving the strongest 2 inches apart. This prevents overcrowding and gives remaining plants room to grow. If you're transplanting directly into the garden, wait until true leaves appear (the second set after the initial cotyledons) before moving them outdoors.
Hardening off takes 7-10 days: start by placing seedlings outside in a shaded spot for 1-2 hours, then gradually increase their time outdoors. Once they tolerate full sun and wind without wilting, they're ready for their permanent spot. Chives are hardy and adaptable, but they thrive in full sun to partial shade with well-draining soil—perfect for kitchen gardens or edging flower beds.
Tips & tricks for perfect chive seed germination
Here's what I learned the hard way about getting chive seeds to sprout reliably—these details make all the difference between success and frustration.
Soaking Strategy: The 12-24 hour soak in lukewarm water is non-negotiable for breaking chive seed dormancy. Use water that feels warm to your wrist—not hot enough to cook an egg, but definitely above room temperature. This softens the tough seed coat while preventing heat shock. I've found that adding a pinch of honey (1/4 teaspoon per cup of water) during soaking can boost germination rates by creating a mild osmotic environment—just rinse seeds thoroughly before planting.
Moisture Balance in Stratification: The dampened peat moss or coconut coir should feel like a wrung-out sponge—if you squeeze it, one drop might fall out, but it shouldn't drip. Too much moisture creates anaerobic conditions that kill seeds, while too little halts germination. I like to test this by gently squeezing the medium: if it holds its shape but leaves a slightly damp imprint on my fingers, it's perfect. This moisture level is critical during the entire 2-week cold stratification period.
Refrigerator Placement: Never store your stratification bag on the fridge door where temperatures fluctuate wildly. The middle shelf maintains the most consistent 34-40°F range—this mimics natural winter conditions that trigger germination. I keep mine near the crisper drawer (but not inside it) for extra humidity stability. If your fridge runs cooler, you might need to extend the 14-day period by 2-3 days to compensate.
Light Transition Secret: When moving sprouted seeds to their warm spot after stratification, don't rush them into bright light immediately. Start with 4-6 hours of indirect light daily during the first 3-4 days, then gradually increase to 12-14 hours over a week. This prevents seedling shock and promotes stronger stems. I use a sheer curtain over my windowsill for the first few days to diffuse harsh sunlight.
Pro Tips for Chive Seed Germination
- Here's what I learned the hard way about getting chive seeds to sprout reliably—these details make all the difference between success and frustration.
- Soaking Strategy: The 12-24 hour soak in lukewarm water is non-negotiable for breaking chive seed dormancy.
- Moisture Balance in Stratification: The dampened peat moss or coconut coir should feel like a wrung-out sponge—if you squeeze it, one drop might fall out, but it shouldn't drip.
Frequently asked questions
Got questions about growing chives from seed? You’re not alone—germination can feel tricky, but we’ve got answers! Here are the most common concerns, simplified for success.
How long does it take for chive seeds to germinate?
With cold stratification, chive seeds typically sprout in 2–3 weeks. If you skip stratification, germination can take 4–6 weeks (or longer) and may be spotty. Patience pays off—keep soil moist and warm (around 60–70°F) for best results!
Do chive seeds need light to germinate?
Nope! Chive seeds do not need light to sprout—they’ll germinate just fine in darkness during stratification. Once they’ve sprouted (after 2–3 weeks), you can move them to a bright, indirect light spot or under grow lights for healthy growth.
What if my chive seeds aren’t sprouting after stratification?
Don’t panic! Try these fixes:
- Check moisture: Soil should stay consistently damp (not soggy). Use a spray bottle if needed.
- Test seed viability: Soak a few seeds in water overnight—if they don’t swell, they may be old or dead.
- Adjust temperature: If your fridge is below 35°F, move them to a cooler spot (like a garage) or use a seedling heat mat.
Can I grow chives from seed indoors year-round?
Chives thrive indoors with 12–14 hours of light daily (grow lights work great). Just use a well-draining potting mix and a small container (they’re shallow-rooted). Transplant outdoors after the last frost, or keep them as perennial houseplants!
What’s a faster alternative to growing chives from seed?
If you’re eager for chives, start with transplants! Nursery-bought seedlings (available in early spring) grow faster and are less fussy than seeds. For a zero-wait option, regrow chives from scraps: Place the white root end in water—new shoots sprout in 1–2 weeks!
Wrapping up and next steps
Mastering chive seed germination through cold stratification is simpler than you think—just three weeks of patience and the right conditions can transform tiny seeds into lush, flavorful sprouts! 🌱 By following the steps outlined here, you’ve unlocked a foolproof method to grow chives year-round, whether indoors or out.
Now that you’re armed with knowledge, there’s no better time to roll up your sleeves and start planting—your kitchen (and taste buds) will thank you!
Ready to take the next step? Grab your seeds, prep your setup, and watch your chives thrive—you’ve got this! 🌿