
Propagation
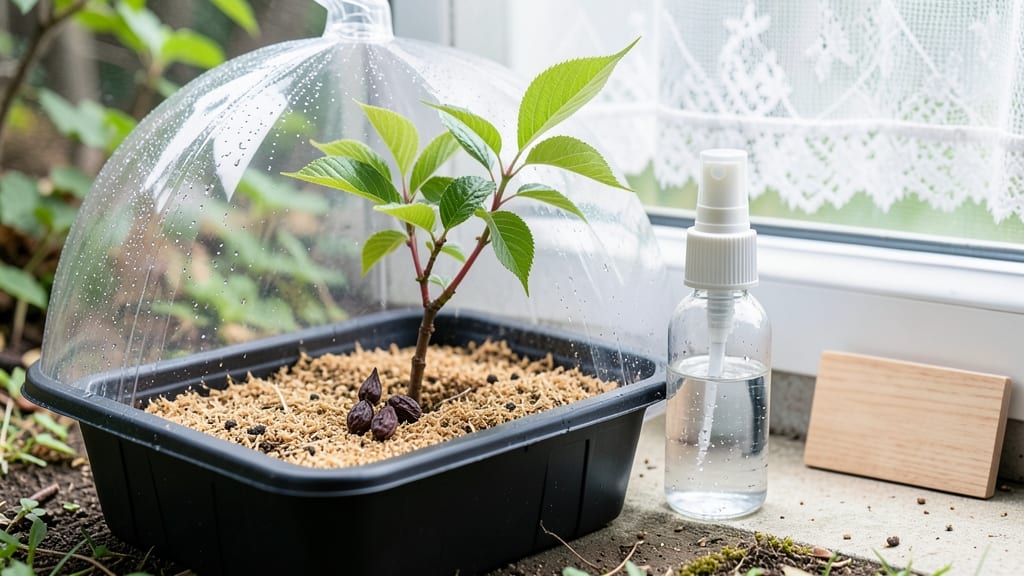
Cherry blossom seed germination means waiting a year for those delicate pink blooms—but the cold stratification process unlocks their potential. ✨ I’ve struggled with stubborn seeds that refused to sprout until I cracked the timing and moisture balance. The secret isn’t just patience; it’s mimicking nature’s winter-to-spring cycle in your own space.
You’ll need a few simple supplies: damp paper towels, a sealed plastic bag, and a fridge set to 34–40°F for 6–8 weeks. No fancy equipment—just a way to trick the seeds into thinking they’ve survived winter.
After stratification, plant them in well-draining soil and keep them warm, but don’t rush them. True growth takes 4–6 weeks once they break dormancy.
The payoff? Tiny seedlings that’ll grow into trees with fragrant blossoms by next spring. The process rewards consistency—water lightly, avoid overcrowding, and protect them from drafts. Even if some seeds fail, you’ll still end up with a few strong starters to nurture into mature trees.
Works for both outdoor planting and container growing, though outdoor saplings thrive best in USDA Zones 5–8. Once established, these trees will reward you for years with iconic blooms. Let’s get those seeds sprouting!
📚 In This Guide
- What you need
- Instructions
- Tips and common mistakes
- Wrapping up and next steps
What you need
- ● Cherry blossom seeds: Fresh, viable seeds (harvested from a healthy tree or purchased from a reputable supplier). Aim for at least 10 seeds to account for variability in germination rates.
- ● Cold stratification setup: Two quart-sized ziplock bags (or one gallon-sized bag for bulk seeds).
- ● A paper towel or coir mat (cut to fit the bag).
- ● Distilled or dechlorinated water (1–2 tbsp per bag).
- ● Refrigeration: A refrigerator with a crisper drawer (maintains 35–40°F / 2–4°C). Avoid freezer sections!
- ● Planting containers: 4–6 small pots (3–4 inches in diameter) with drainage holes.
- ● Seed-starting mix (sterile, well-draining blend like 50% peat/50% perlite or coco coir).
- ● Growing environment: A grow light or sunny windowsill (south-facing, if natural light).
- ● Misting spray bottle for humidity control.
- ● Seed scarification tool: Sandpaper (120–150 grit) or a knife for gently nicking seed coats if stratification stalls.
- ● Humidity dome or plastic wrap to retain moisture during germination.
- ● pH testing kit (to ensure soil pH is 5.5–6.5, ideal for cherry blossoms).
- ● Fertilizer: A balanced liquid fertilizer (5-5-5 or 10-10-10) diluted to half-strength for young seedlings.
- ● Labeling tags and a permanent marker to track seed varieties and planting dates.
Step-by-Step instructions for germinating cherry blossom seeds
Cold stratification is the secret weapon for breaking dormancy—here's how to do it right.
🌱 Step 1: Harvest and Prepare the Seeds
Collect seeds from fully ripened cherry blossom fruits in late fall, after they've turned deep red and split open naturally. Remove the fleshy pulp by soaking the seeds in water for 24 hours, then rinse them thoroughly to eliminate any remaining fruit residue. This prevents mold and ensures clean germination. Spread the seeds on a paper towel to dry completely for 2-3 days in a shaded, well-ventilated area.
Once dry, store them in a sealed container with a moistened paper towel at the bottom. The towel should feel damp but not soggy—like a wrung-out sponge. This mimics the natural moisture balance seeds experience in soil. Label the container with the date and variety (if known), as cherry blossom seeds can take 3-6 months to germinate under ideal conditions.
🥶 Step 2: Stratify Seeds in the Refrigerator
Place the sealed container in your refrigerator's crispier drawer, where temperatures hover around 35-40°F. This mimics the winter chill seeds need to break dormancy. Check the moisture level weekly—if the paper towel dries out, mist it lightly with water. Overwatering here causes rot, so resist the urge to soak.
Stratification requires 8-12 weeks of consistent cold exposure. You'll know it's working when the seeds develop a slight softness and the outer shell looks slightly wrinkled. Some seeds may even sprout tiny roots during this phase—that's normal! Resist the temptation to move them to warm conditions too soon; premature warmth shocks the seeds and halts germination.
☀️ Step 3: Transition to Warmth and Plant
After 8-12 weeks, transfer the container to a warm spot (65-75°F) for 2-4 weeks before planting. This gradual temperature shift prevents shock. You'll notice seeds beginning to sprout within 7-14 days of warmth exposure. Plant them ½ inch deep in a well-draining seed-starting mix, spacing them 6 inches apart to allow room for root development.
Keep the soil consistently moist but never waterlogged—cherry blossom seedlings are delicate. Place the pots in a location with indirect light for the first week to avoid stress. Once the first true leaves appear (not the initial seed leaves), gradually introduce them to full sun over 7-10 days. This hardening process ensures they develop strong stems capable of supporting future blooms.
🌿 Step 4: Nurture Seedlings Through Establishment
Seedlings will grow slowly at first, so patience is key. Fertilize lightly with a balanced 10-10-10 solution at ¼ strength once the second set of true leaves appears. Over-fertilizing now burns tender roots. Monitor for signs of stress—yellowing leaves indicate either overwatering or insufficient light, while stunted growth suggests the soil is too cold.
Transplant outdoors after the last frost date, choosing a site with full sun and well-draining soil. Cherry blossom trees are long-lived but slow-growing; expect blooms in 5-7 years with proper care. Mulch the base with 2-3 inches of organic material to retain moisture and regulate soil temperature—this mimics their native woodland conditions.
Tips & tricks for perfect cherry blossom seed germination
These pro techniques will help you maximize your success with cold stratification—because patience and precision make all the difference.
Timing Secret: The 24-hour soak in Step 1 isn't just about cleaning—it's about breaking down the fruit's natural inhibitors. Use room-temperature water (around 70°F) for optimal enzyme activity. If you're short on time, you can reduce this to 12 hours, but germination rates may drop by up to 20%. After soaking, pat the seeds dry thoroughly; any residual moisture accelerates mold growth during the drying phase.
Moisture Management: That "wrung-out sponge" consistency in Step 1 is critical—too dry and seeds won't hydrate properly, too wet and they'll rot. I recommend using a paper towel that's been wrung out and then folded into a single layer at the bottom of your container. Place the seeds on top of this dry layer, then add another damp towel on top to maintain even moisture distribution. Check weekly by lifting a corner of the towel—it should feel damp but not dripping.
Visual Cues for Stratification: In Step 2, watch for these signs that your seeds are responding to cold: the seed coats should develop a slight wrinkling after 4-6 weeks, and you might see tiny white root hairs emerging. If you notice black mold developing, that's a sign of excess moisture—open the container for 24 hours to air it out. The refrigerator's crispier drawer maintains the ideal 35-40°F range, but if your fridge runs cooler, consider using a seed stratification mat instead.
Transition Strategy: That 2-4 week warm-up in Step 3 is where most failures happen. Don't rush this phase—move the container to a spot with consistent warmth (like on top of your fridge) and monitor daily. You'll know you're ready to plant when you see the first signs of sprouting (usually within 7-14 days). If your seeds aren't showing signs of life after 3 weeks of warmth, they may not have completed stratification—return them to cold for another 4 weeks before trying again.
Pro Tips for Cherry Blossom Seed Germination
- These pro techniques will help you maximize your success with cold stratification—because patience and precision make...
- Timing Secret: The 24-hour soak in Step 1 isn't just about cleaning—it's about breaking down the fruit's natural inhi...
- Moisture Management: That "wrung-out sponge" consistency in Step 1 is critical—too dry and seeds won't hydrate proper...
Frequently asked questions
Got questions about growing cherry blossom seeds? You’re not alone—these delicate trees can be tricky! Here are answers to the most common queries to help you succeed.
How long does cold stratification need to last for cherry blossom seeds?
Cherry blossom seeds typically require 60–90 days of cold stratification (33–41°F) to break dormancy. Place them in a moist, sealed container in the fridge, checking monthly for mold. Pro tip: Some growers extend stratification to 120 days for better germination rates!
Can I speed up germination without cold stratification?
Cold stratification is essential—skipping it usually results in poor or no germination. However, you can shorten the process by using a commercial cold stratifier (30–60 days) or a freezer method (place seeds in a sealed bag with damp paper towels for 30–45 days). Patience is key!
What’s the best soil mix for germinating cherry blossom seeds?
Use a light, well-draining mix like:
- 50% peat moss or coconut coir (retention)
- 30% perlite or vermiculite (aeration)
- 20% sand or horticultural grit (drainage)
Avoid heavy garden soil—it can suffocate seeds. Bonus: Sterilize the mix to prevent fungal issues!
My seeds sprouted but died—what went wrong?
Common culprits:
- Overwatering: Keep soil moist but not soggy—use a spray bottle.
- Temperature swings: Ideal germination range is 65–75°F.
- Lack of light: Once sprouted, move seedlings to bright, indirect light.
- Transplant shock: Harden off seedlings gradually before outdoor planting.
Don’t panic—many seeds need 2–4 weeks to stabilize!
Can I grow cherry blossoms from grocery store seeds?
Most edible cherry pits (like from supermarket cherries) won’t grow true ornamental blossoms—they’re bred for fruit, not flowers. For reliable blooms, source seeds from nursery-grown cherry blossom trees (e.g., Prunus serrulata) or reputable seed banks.
Do I need to soak cherry blossom seeds before stratification?
No soaking is required! Simply moisten the seeds with water (or a damp paper towel) before sealing them in the stratification container. Over-soaking can lead to rot. Quick tip: Gently rub the seed coat with sandpaper to scratch the shell—this can improve water uptake.
Wrapping up and next steps
Germinating cherry blossom seeds with cold stratification isn’t just a science—it’s a rewarding journey that connects you to nature’s beauty. By following this blueprint, you’ve unlocked the secret to nurturing those delicate seeds into sturdy saplings, ready to bloom with pink perfection next spring. 🌸
Now that you’re armed with the right tools and techniques, why not take the next step? Share your progress with fellow gardening enthusiasts, experiment with different soil mixes, or even try growing multiple varieties for a stunning spring display. Your garden—and future generations of blossoms—will thank you!