
Propagation
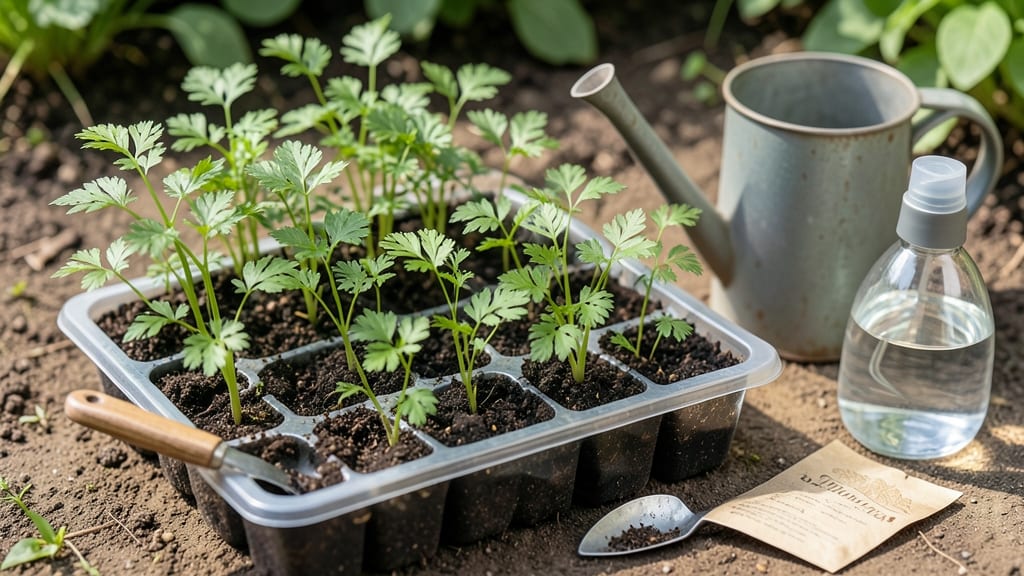
Starting carrots in seed trays gives you a head start on the growing season—no more waiting for direct-sown seeds to germinate in cold soil. 🌱 I’ve used this method for years, and it’s the secret to avoiding the leggy, weak seedlings that often come from planting too deep or too late.
The key is shallow soil depth and patience, because carrot seeds need just the right conditions to sprout without stretching toward the light.
You’ll need seed trays with drainage holes, a lightweight seed-starting mix (not heavy garden soil), and a warm spot near a sunny window or under grow lights. Carrot seeds are tiny, so sprinkle them ¼-inch deep in rows, spacing them ½-inch apart—this prevents overcrowding later.
Keep the soil consistently moist but never soggy, and you’ll see those first green shoots in 7-14 days, depending on temperature.
The payoff? Thick, straight carrots that emerge from the soil ready to transplant without shock. No more bolting from heat stress or forking from poor spacing. With seed trays, you control the environment—protecting tender sprouts from pests, uneven soil, and temperature swings that can derail direct sowing.
Once seedlings have 2-3 true leaves (about 4-6 weeks), harden them off for a week before moving to the garden. Plant them deeply—the tops will photosynthesize while the roots grow downward.
This method works especially well in cooler climates where the growing season is short, giving you 4-6 weeks of early growth before outdoor conditions are ideal.
📚 In This Guide
- What you need
- Instructions
- Tips and common mistakes
- Wrapping up and next steps
What you need
- ● Seed trays: 1–2 shallow trays (4–6 inches deep) with drainage holes. Pro tip: Biodegradable trays are ideal for transplanting later!
- ● Seed starting mix: 2–3 quarts of high-quality, sterile potting soil (avoid garden soil—it’s too dense for tiny seeds!).
- ● Carrot seeds: A packet of open-pollinated or heirloom carrot seeds (e.g., ‘Nantes,’ ‘Danvers,’ or ‘Paris Market’). Note: Carrot seeds are often tiny and sold as “pellets” for easier handling.
- ● Watering can or spray bottle: With a fine mist nozzle to avoid disturbing seeds.
- ○ Clear plastic dome or plastic wrap: To create a mini greenhouse effect (optional but helpful for humidity).
- ○ Fine-mesh screen or paper towels: For covering trays if you’re pre-sprouting seeds (optional but speeds up germination).
- ○ Heat mat (optional): Keeps soil warm (70–75°F) for faster germination.
- ● Grow lights or sunny windowsill: Carrots need 12–16 hours of light daily until transplanting.
- ● Plant labels: Small sticks or markers to track seed varieties.
- ● Tweezers or popsicle sticks: For gently pressing seeds into soil without crushing them.
- ● A sunny indoor space or grow lights (carrots need light to germinate!).
- ● Patience! Carrot seeds can take 2–3 weeks to sprout—don’t give up!
- ● Consistent moisture: Keep soil damp (not soggy) until seeds germinate.
Step-by-Step instructions for starting carrots in seed trays
Carrots can start in seed trays—but only if you follow these precision steps to avoid stunted roots.
🌱 Step 1: Select the Right Trays and Soil Mix
Use 2-3 inch deep seed trays with drainage holes—carrots develop long taproots and need room to grow straight down. I avoid peat pots because they restrict root expansion. Instead, I use biodegradable fiber trays that can be planted directly into the garden later.
Fill trays with a light, sandy loam mix (never regular potting soil—it’s too dense). Add 20% perlite or vermiculite to improve drainage and prevent soil crusting. Moisten the mix until it feels like a wrung-out sponge—damp but not dripping. Press it down lightly so seeds have good soil contact but don’t compact it too tightly.
🌱 Step 2: Sow Seeds Precisely for Germination
Carrot seeds are tiny—one packet contains 10,000+ seeds—so I use a seed spreader or toothpick to place them ¼ inch deep and ½ inch apart. Planting too deep delays germination, while shallow sowing risks soil crusting. Cover seeds with a fine layer of mix, then mist gently with water until the surface looks uniformly damp.
Place trays in a warm, dark spot (70-75°F) until germination. A seedling heat mat speeds this up—carrots take 14-21 days to sprout. Don’t water again until the soil surface feels dry to the touch. Overwatering now causes seeds to rot before they sprout.
☀️ Step 3: Provide Light and Thin Seedlings
Once seedlings emerge, move trays to bright, indirect light (no direct sun yet). Carrot seedlings are delicate—too much light too soon causes them to bolt. I use a grow light on a 14-hour timer, keeping it 4-6 inches above the trays. You’ll see first true leaves (not the tiny cotyledons) in 10-14 days—this is your cue to thin.
Thin seedlings to 1 inch apart using scissors (don’t pull—they’re brittle). Keep the strongest, straightest seedlings. If roots touch the tray bottom, it’s time to transplant—carrots hate being root-bound. I harden off seedlings by placing trays outside for 2 hours daily over 5-7 days before moving them to the garden.
🪴 Step 4: Transplant Carefully to Prevent Forking
Transplant seedlings into the garden when they’re 2-3 inches tall and soil temperatures reach 60°F. Dig holes twice as deep as the tray to encourage straight root growth. Space them 2-3 inches apart in rows 12 inches apart. Water deeply after planting to settle soil around roots.
Mulch with 1 inch of straw to retain moisture and prevent soil crusting. Carrots need consistent water—don’t let soil dry out, or roots fork. If seedlings look leggy or pale, they need more light. You’ll know they’re thriving when leaves are dark green and roots are growing straight down.
Tips & tricks for perfect carrot sprouting in seed trays
Here's what nobody tells you about getting those delicate carrot seedlings off to the right start.
Soil Texture is Everything: The sandy loam mix in Step 1 isn't just about drainage—it's about creating the perfect "sponge-like" consistency. I've found that adding an extra 10% coconut coir to that 20% perlite mix helps retain moisture better while still preventing crusting. Press the soil down just enough to eliminate air pockets, but don't compact it like you would for tomatoes. Think "light as a cloud" rather than "firm as a brick."
Germination Timing Secret: Those 14-21 days to sprout might seem long, but patience pays off here. I've noticed that seeds sown in the afternoon (rather than morning) tend to germinate faster—likely because the evening warmth helps kickstart the process. Place a small thermometer in your germination spot to confirm you're maintaining that 70-75°F range consistently. If your kitchen fluctuates, a seedling heat mat is worth the investment.
Light Transition Strategy: The move from dark to bright indirect light in Step 3 is critical. I've had the best success by gradually increasing light exposure over 3 days rather than making the full switch immediately. Start with just 2 hours of indirect light on day 1, then add 2 more hours each subsequent day. This mimics natural sunlight patterns and prevents bolting. Watch for leaves that look slightly cupped—they're telling you they need more light.
Transplanting Pro Tip: When transplanting those 2-3 inch seedlings in Step 4, I've found that soaking the trays for 10 minutes before removing them makes the seedlings slide out intact. Gently tease apart any roots that have grown together, but don't force it—you want to preserve as much root structure as possible. The "twice as deep" hole recommendation is crucial for straight roots, but I've added that I often make the hole slightly wider at the bottom to create a "root nest" that encourages downward growth.
Pro Tips for Can You Start Carrots In Seed Trays
- Here's what nobody tells you about getting those delicate carrot seedlings off to the right start.
- Soil Texture is Everything: The sandy loam mix in Step 1 isn't just about drainage—it's about creating the perfect "s...
- Germination Timing Secret: Those 14-21 days to sprout might seem long, but patience pays off here. I've noticed that ...
Frequently asked questions
about starting carrots in seed trays—because every gardener deserves a little clarity!Why should I start carrots in seed trays instead of direct sowing?
Seed trays give carrots a head start in cooler climates or short growing seasons. They help avoid pests (like carrot rust flies) and improve germination rates. Plus, seedlings grow stronger before transplanting, reducing transplant shock. Ideal for long-season varieties or heirloom types!
How long should I keep carrot seedlings in trays before transplanting?
Wait until seedlings have 2–3 true leaves (not just the first seed leaves) and are about 1–2 inches tall. Overcrowding in trays can stunt growth, so aim for 3–4 weeks total. Harden off seedlings for 5–7 days before moving them to soil—gradually expose them to outdoor conditions!
Can I reuse seed trays for carrots after another crop?
Yes! Clean trays thoroughly with soapy water and a 10% bleach solution (1 part bleach to 9 parts water) to kill pathogens. Rinse well and let dry. Avoid reusing trays for carrots right after leafy greens or brassicas (like cabbage) to prevent disease transfer.
My carrot seedlings look leggy—what went wrong?
Leggy seedlings usually mean too little light or overcrowding. Move trays to a sunny windowsill or under grow lights (12–16 hours/day). Thin seedlings to ½ inch apart in trays and avoid burying seeds too deep—carrots need light to germinate properly!
What’s a good alternative if I don’t have seed trays?
No trays? No problem! Use biodegradable peat pots, egg cartons, or even paper towels (moisten and place seeds between layers). For direct sowing, use furrowed soil with fine, loose texture—carrots hate being crowded, so space seeds ¼ inch apart in rows 12+ inches apart.
Wrapping up and next steps
Starting carrots in seed trays is totally doable—and with the right approach, you’ll enjoy a bountiful harvest of sweet, crisp roots! 🥕 The key is patience, proper spacing, and a little TLC to keep those seedlings strong.
Now that you’ve got the know-how, it’s time to roll up your sleeves and give it a try.
Ready to take the next step? Grab your seed trays, gather your supplies, and plant those tiny seeds with confidence. Soon, you’ll be thinning, transplanting, and savoring homegrown carrots like a pro! Happy growing! 🌱