
Size
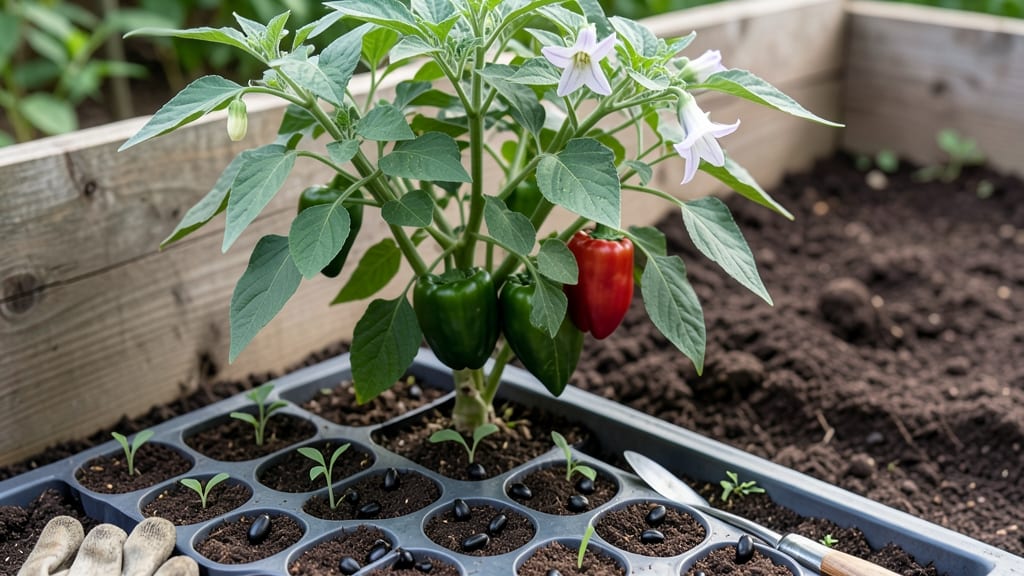
Growing bell pepper seeds in your garden starts 10-12 weeks before your last frost date—that’s when the real magic begins. 🌱 I’ve learned the hard way that rushing this step means leggy seedlings and delayed harvests, but getting the timing right guarantees plump, sweet peppers all summer long.
The key is matching your local climate to the plant’s needs, because bell peppers hate cold soil and frost. You’ll need a sunny spot (at least 6-8 hours of direct sunlight daily), well-draining soil with compost mixed in, and patience for germination—which can take 7-21 days depending on temperature.
Most beginners overwater or overcrowd seedlings, which leads to damping-off (that sad, mushy stem collapse). The fix? Keep soil lightly moist, use small pots, and space them 12-18 inches apart once transplanted. By mid-summer, you’ll be picking bright red, yellow, or purple peppers straight from the vine—no store-bought blandness here.
The plants keep producing until frost, so the earlier you start, the longer your harvest. Just remember: bell peppers need warmth to thrive, so if your spring is cool, opt for longer-maturing varieties or extend the season with row covers.
This method works for any garden size, from raised beds to in-ground plots. The only real mistake is waiting too long to plant—so grab those seeds now and let’s get growing!
📚 In This Guide
- What you need
- Instructions
- Tips and common mistakes
- Wrapping up and next steps
What you need
- ● Bell Pepper Seeds: Choose disease-resistant varieties like California Wonder or Jupiter. Buy 5–10 seeds per plant (or 1 packet for multiple plants).
- ● Seed Starting Trays or Pots: 2–3 inch deep cells or 4–6 inch pots (biodegradable or plastic). Aim for 6–10 trays/pots if starting indoors.
- ● Seed Starting Mix: Lightweight, sterile mix with perlite or vermiculite (avoid garden soil). Use 1–2 bags (10–15 qt).
- ● Grow Lights or Sunny Window: A full-spectrum LED grow light (12–16 hours/day) or a south-facing window for seedlings.
- ○ Heat Mat (Optional but Helpful): Maintains soil temps at 75–85°F for faster germination.
- ● Spray Bottle: For gentle watering (avoid over-saturating seeds).
- ● Fertilizer: Balanced 10-10-10 or 5-10-10 starter fertilizer (follow label for dilution).
- ○ Transplant Shock Solution (Optional): Seaweed extract or compost tea to ease the transition outdoors.
- ● Well-Draining Soil: Amend garden beds with compost (2–3 inches mixed in) for nutrients.
- ● Mulch: Straw or shredded leaves to retain moisture and suppress weeds.
- ○ Support (Optional): Small stakes or cages if growing large varieties (e.g., banana peppers).
- ● Drip Irrigation or Soaker Hose: Keeps roots consistently moist without wetting foliage (prevents disease).
- ● Last Frost Date: Wait until after the last frost (bell peppers hate cold!). Check your local frost calendar.
- ● Warm Soil: Soil should be at least 60°F (use a soil thermometer to confirm).
- ● Sunlight: 6–8 hours of direct sun daily (partial shade in hot climates).
Step-by-step instructions for planting bell pepper seeds
Here's my foolproof method for getting bell pepper seeds in the ground at the perfect time.
🌱 Step 1: Start Seeds Indoors 8-10 Weeks Before Last Frost
Fill small seedling trays with sterile seed-starting mix and plant seeds ¼ inch deep. I like to use biodegradable pots because they eliminate the need for transplant shock later. Keep the soil consistently moist but never soggy—bell pepper seeds need warmth and humidity to germinate.
Place the trays in a warm spot with a heat mat set to 75-85°F. Germination typically takes 7-14 days, but don't be surprised if it takes longer in cooler conditions. Once sprouts appear, move them to a sunny windowsill or under grow lights for 14-16 hours daily.
Watch for the first true leaves (the second set after the initial cotyledons) to appear. This is your signal to begin fertilizing lightly with a balanced liquid fertilizer diluted to half-strength. Over-fertilizing now can burn tender seedlings.
☀️ Step 2: Harden Off Seedlings 2 Weeks Before Transplanting
Two weeks before your last frost date, start hardening off your seedlings by placing them outside in a sheltered spot for 1-2 hours the first day. Gradually increase their outdoor time by 1 hour daily until they can tolerate a full day outside. This process helps them adjust to wind, sun, and temperature fluctuations.
I like to place them in a partially shaded area at first, then slowly introduce more sunlight. You'll know they're ready when they look plump and vibrant, not wilted or stressed. Avoid transplanting when nighttime temperatures dip below 55°F—bell peppers are frost-sensitive and won't recover.
If your last frost date is still weeks away, consider using a grow tunnel or row covers to extend the season. These create a microclimate that protects young plants while allowing sunlight to penetrate.
🪴 Step 3: Plant Seedlings in Well-Prepared Soil
Choose a sunny spot that gets at least 6-8 hours of direct sunlight daily. Bell peppers thrive in warm, well-draining soil with a pH between 6.0 and 6.8. Before planting, mix 2-3 inches of compost into the top 6-8 inches of soil to improve fertility and drainage.
Dig holes slightly larger than the seedlings' root balls and space them 18-24 inches apart in rows 24-36 inches apart. Plant each seedling at the same depth it was growing in its container—burying too deep can cause stem rot. Gently firm the soil around the base to eliminate air pockets.
Water deeply right after planting to settle the soil and encourage root growth. Avoid wetting the leaves, as this can spread disease. Mulch around the base with 2-3 inches of straw or shredded leaves to retain moisture and suppress weeds.
💧 Step 4: Maintain Consistent Water and Fertility
Bell peppers need 1-1.5 inches of water weekly, but they're sensitive to inconsistent moisture. Water deeply at the base of the plant in the morning to allow foliage to dry out during the day, reducing the risk of fungal diseases like blight.
Fertilize every 2-3 weeks with a balanced fertilizer (like 10-10-10) or a tomato and vegetable blend. You'll see the difference in plant vigor and fruit production. Avoid high-nitrogen fertilizers—they promote leafy growth at the expense of fruit.
Watch for signs of stress, like yellowing leaves or blossom end rot. These issues often stem from inconsistent watering or calcium deficiency. If you notice them, adjust your care routine immediately—bell peppers are resilient but need consistent conditions to thrive.
Tips & tricks for perfect bell pepper seed planting
Here's what nobody tells you about getting your bell pepper seedlings off to the strongest start.
Seedling Heat Strategy: That 75-85°F heat mat range is non-negotiable for germination—bell pepper seeds won't sprout reliably below 70°F. I've seen them take 21 days to germinate when kept at 65°F instead of the recommended range. If your home stays cooler than 70°F at night, consider using a seedling heat mat with a built-in thermostat to maintain consistent warmth. The extra investment pays off with faster, more uniform germination.
Lighting Game-Changer: Those 14-16 hours daily of light aren't just about duration—they're about intensity too. If you're using grow lights, position them 2-3 inches above seedlings for optimal growth. I notice a dramatic difference in stem strength when seedlings get full-spectrum LED lights rather than just fluorescent bulbs. Rotate trays daily so all seedlings get even exposure, preventing them from leaning toward the light source.
Harden Off Like a Pro: The gradual 1 hour daily increase during hardening off is crucial, but timing matters just as much. Start this process when nighttime temperatures consistently stay above 55°F—that's your true indicator, not just the calendar date. I've had seedlings shock when moved too early, even when the forecast promised warm nights. A simple trick: Place a minimum/maximum thermometer near your hardening-off spot to track actual nighttime temperatures rather than relying on weather forecasts.
Soil Prep Secret: When mixing 2-3 inches of compost into the top 6-8 inches of soil, don't just scratch it in—work it thoroughly to create a uniform blend. I've found that using a broadfork to loosen the native soil first makes all the difference. This prevents pockets of rich soil that can cause uneven growth. For container gardeners, mix compost directly into your potting soil at a ratio of 20% compost to 80% soil—this gives you the same fertility benefits without the risk of compaction.
Pro Tips for Bell Pepper Seed In Grow A Garden
- Here's what nobody tells you about getting your bell pepper seedlings off to the strongest start.
- Seedling Heat Strategy: That 75-85°F heat mat range is non-negotiable for germination—bell pepper seeds won't sprout ...
- Lighting Game-Changer: Those 14-16 hours daily of light aren't just about duration—they're about intensity too. If yo...
Frequently asked questions
Got questions about growing bell peppers from seed? You’re not alone! Here are some of the most common concerns—and their solutions—to help you grow a thriving garden.
How long does it take for bell pepper seeds to germinate?
Bell pepper seeds typically take 7–21 days to germinate, depending on temperature and moisture. Keep the soil warm (70–85°F) and consistently damp for the best results. A heat mat can speed up germination if your indoor space is cool. Pro tip: Don’t overwater—soggy soil can cause rot!
When is the best time to plant bell pepper seeds indoors vs. outdoors?
Start seeds 8–10 weeks before your last frost date indoors under grow lights. Transplant seedlings outdoors after all danger of frost has passed and soil temps reach at least 60°F. In warm climates, direct-sow seeds 2–3 weeks after the last frost for a head start.
Why aren’t my bell pepper plants flowering or fruiting?
Common culprits include cool temps, low light, or poor pollination. Bell peppers need full sun (6+ hours/day) and warm soil. Hand-pollinate flowers by gently shaking them or using a small brush. If nights dip below 55°F, consider row covers or moving pots to a sheltered spot.
Can I grow bell peppers in containers, and what size pot do I need?
Yes! Bell peppers thrive in 5-gallon containers or larger with drainage holes. Use a high-quality potting mix and fertilize every 2–3 weeks. Dwarf varieties (like ‘Snackable’ or ‘Pico de Gallo’) work best in smaller pots (3–5 gallons). Pro tip: Place containers in a sunny spot and rotate them weekly for even growth.
What pests should I watch for, and how do I prevent them?
Keep an eye out for aphids, spider mites, and hornworms. Use neem oil or insecticidal soap for soft-bodied pests, and handpick hornworms (they’re easy to spot!). Encourage beneficial insects like ladybugs by planting marigolds or basil nearby. Healthy plants resist pests better—so mulch and water consistently!
Wrapping up and next steps
Growing bell peppers from seed is a rewarding journey that brings vibrant colors, crisp flavors, and a sense of accomplishment to your garden! 🌱 With the right frost-free planting calendar, soil prep, and care, you’ll enjoy a bountiful harvest—whether you’re a beginner or a seasoned gardener.
Now that you’re armed with tips and timelines, it’s time to roll up your sleeves and start planting!
Your next step? Pick your favorite varieties, mark your calendar, and prepare your garden beds. Happy growing—and may your peppers be plentiful! 🌶️